Showing posts with label vegetables. Show all posts

Monday, March 31, 2014

delicious roasted sweet potatoes


We eat a lot of sweet potatoes, but I had been getting bored with our usual baked and mashed dishes. I decided to try toasting them, and they are now my new favorite way to prepare sweet potatoes.  This is an incredibly easy, yummy side dish. A little bit of oil and some salt is all it takes to enhance the flavor, and roasting really brings out their sweetness, giving them slightly crispy edges while keeping the interior really soft. They almost taste caramelized. I love this dish. It's super easy, tastes great and cooks pretty quickly.

Roasted Sweet Potatoes

I N G R E D I E N T S :

3-4 sweet potatoes
XVOO or coconut oil
Salt (I use sea salt)


D I R E C T I O N S :
Preheat oven to 425
Rinse, peel and dice potatoes.
Place potatoes in a bowl and coat in a small amount of XVOO.
Spread potatoes in a baking pan (I line my pan with parchment paper-just check to make sure yours is okay for that high of a temperature if you decide to use it).
Sprinkle generously with salt.
Bake for 30-35 minutes, until the edges are browned and insides are soft, tossing once during cooking.

Wednesday, January 15, 2014

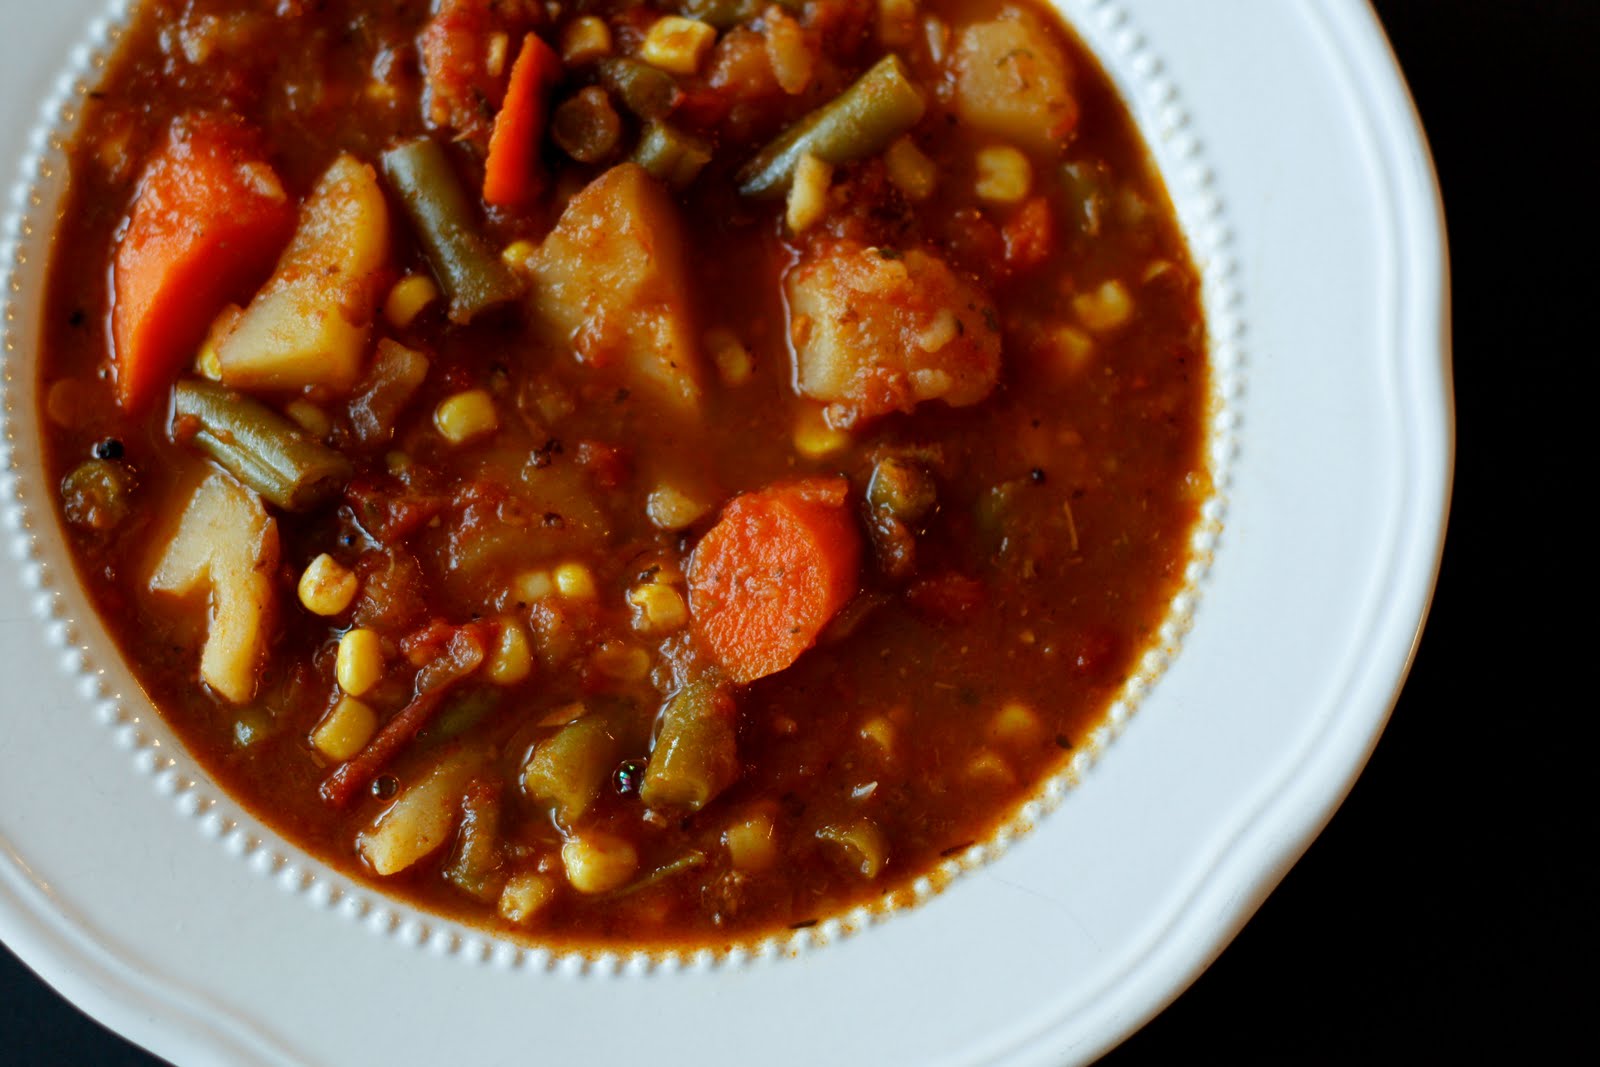
Homemade vegetable beef soup


I have wanted to find a favorite vegetable beef soup recipe for some time now, and I think I finally have. I had the best vegetable beef soup at a restaurant this past fall, and asked the waiter what all they put in it. After looking around online and including what they mentioned, I played around with a recipe that I've now made twice, and we all love it. It's just a traditional vegetable beef soup but I love the flavor. The combination of chicken and beef broth along with vegetable juice is one I love because it gives a great flavor but isn't too beefy or tomatoey. I also used a sweet potato instead of a white one, not knowing how it would turn out, and we loved it. It adds a subtle sweet yet savory flavor to the soup, but is not at all overwhelming- just a good, healthy addition that I'll use from now on. This soup is very quick and easy to make and it makes enough for the four of us to have for two meals.  Pasta could also be added to make it go further. I didn't measure out my spices but sprinkled them generously over the soup. We had this for dinner but it also makes great leftovers for lunch. I would love to double this next time and freeze half of it.

Vegetable beef soup

I N G R E D I E N T S :
2 Tbsp XVOO (could also use vegetable oil, I just use olive oil because it's healthy)
1 medium-large onion, diced
2 cloves garlic, minced
1 lb beef
28 ounces tomato (roughly chop up a can of whole tomatoes or buy diced), drained
15 oz chicken broth
15 oz beef broth
1 Tbsp. better than bouillon chicken base  (I know this stuff isn't nutritious but it gives great flavor!)
1/2 Tbsp. better than bouillon beef base
1 1/2 cups vegetable juice, like V-8
28 ounces frozen vegetables (I used a mix of corn, green beans, peas, carrots, etc)
1 cup frozen lima beans (you can also add more of other frozen vegetables, too)
1 sweet potato, diced
dash of Worcestershire sauce
1 tsp. salt
1/2 tsp. pepper (add more if you like)
Garlic powder
Onion powder
Oregano, dried
Basil, dried
Parsley, dried
Parmesan cheese, to sprinkle on top of soup
Ciabatta or any other good bread, or crackers for serving along with soup.

D I R E C T I O N S :
Heat oil over medium-high heat and sauté onion and garlic until onion is translucent and garlic is turning a golden color. 
Add ground beef and brown until completely cooked. Drain all excess oil.
Add tomatoes, broth, chicken and beef bases, vegetable juice, vegetables, Worcestershire sauce, salt and pepper to pot. Generously sprinkle remaining spices over the soup (going a little lighter on the garlic and onion powders). Bring back to a boil on medium heat, and then let simmer on medium-low for 10-15 minutes, or until vegetables are tender. 
Adjust seasonings to taste.
I find it best to let the soup sit on low for a little while to continue to let the flavors combine, so I'll make this a couple of hours before dinner. 
Top individual bowls with a small amount of parmesan cheese, and serve with bread or crackers. I took a loaf of ciabatta, cut it in half to make two long slices, and brushed it with melted butter before sprinkling it with a very small amount of garlic powder and salt and topping with a little parmesan. I baked it on 350 for 10-15 minutes until the edges were just turning brown, and it was a great addition to the soup. 


Thursday, July 11, 2013

simple baked squash


This recipe is almost embarrassingly simple but something I make several times a summer when we have lots of squash. It's a very basic recipe and a nice, easy vegetable dish that we always like. We like to do veggie nights and in the summer they are great-some squash, pinto beans, corn bread, sweet potatoes, and fresh tomatoes and cucumbers all make a great meal. Last night I served this with bbq chicken, mashed potatoes and cucumbers and tomatoes.

Baked Squash

I N G R E D I E N T S :
Several squash...4-5 big ones or 8 or so little ones
1 1/2 cups milk
1/2 cup corn meal
1/2 cup all-purpose flour
salt
pepper

D I R E C T I O N S :
Preheat oven to 350.
In one dish place milk, and in another place mixed cornmeal and flour.
Wash and slice squash-I try to slice it very thin-less than 1/4".
Dip squash in milk, then coat in flour mixture.
Place on baking sheet and sprinkle with salt and pepper.
Bake for 30 minutes, then turn each slice over and bake another 30 minutes.
Squash should be soft and golden.


Tuesday, January 17, 2012

Broccoli cheese soup ::re-post::


I'm updating some of my pictures and recipes that I tried at the beginning of this blog. This is one of them. I love broccoli cheese soup and it's always nice to have for a simple, warm meal in the middle of winter.  I love that this soup is a comfort food but not too thick or creamy. It tastes much lighter than most that you would have at a restaurant (probably because it is slightly healthier in that it doesn't have heavy cream or processed american cheese food in it), but it is still very satisfying. It is super easy to make and comes together in under 30 minutes.


Broccoli cheese soup

Adapted from recipes I referrenced at For the Love of Cooking and in my Better Homes and Gardens cookbook.

I N G R E D I E N T S :

1/2 of one finely chopped onion (I always prefer sweet white onions)
3 Tbsp. butter
1/4 cup flour
2 cups milk
4 cups chicken broth (I used store bought organic broth but also added one bouillon cube for extra flavor)
2 cups cheddar cheese, grated
3-4 slices american cheese (I used white american from the deli)
2 medium sized bags of frozen broccoli florets
1 tsp. salt (I used kosher)
fresh pepper

D I R E C T I O N S :

Cook broccoli in a small amount of water (between 1/2-1 cup) until tender. Once the broccoli is cooked, puree half of it. Set the remaining broccoli to the side.

Melt butter in a large dutch oven over medium heat. Add the onions and saute until tender. Add flour, stir and cook for a few minutes. Slowly add the milk while stirring-the ingredients will thicken as you do this to create a roux. Let thicken up as you occasionally stir for a few minutes on medium-low heat.

Add chicken broth and salt, then all of the broccoli.

Add cheese and stir until well blended, letting simmer on low for a few minutes.

Add pepper to taste.


Wednesday, October 27, 2010

The best butternut squash soup.


Two sweet friends recently had me over for dinner, and served the most delicious soup! I helped myself to two large bowls, quickly asked for the recipe, and gladly accepted the leftovers. This soup is absolutely delicious, and perfect for a fall day. This soup is also very nutritious, and filling. I just love it!

Butternut Squash soup
Slightly adapted from a recipe by my friend Allison


I N G R E D I E N T S :
1 Tbs unsalted butter
1 yellow onion, thinly sliced
1 medium-sized butternut squash
2 Granny Smith apples, peeled, cored and diced
2 cups chicken stock
1/4-1/2 cup pureed pumpkin (optional, but a nice addition if you have some on hand)
1/2 cup of half and half
1/4 teaspoon of coriander
A nice, long squirt of honey 
1/4 cup of brown sugar, or less (depending on taste)
Salt, to taste


D I R E C T I O N S :
Preheat oven to 450 degrees F. 
Cut squash in half. Drizzle a little honey and oil, and sprinkle
some salt and pepper over flesh side of squash halves. Wrap in foil, and roast for 1 hour. (Doing this the day before makes day of prep much quicker).
Remove from foil, and peel and chop squash into large chunks.
In a dutch oven or large pot, saute onion in 1 Tbsp. butter until tender and clear. Add chicken stock, peeled and sliced apples,  squash, and pumpkin. Bring to a boil over medium heat. Reduce to low, and let simmer for 10 minutes or until apples are tender.
Puree in batches in a blender or food processor, or you can use an immersion blender.
Stir in half and half, coriander, honey, and brown sugar to taste. If soup is already pretty sweet, omit brown sugar.


Monday, September 13, 2010

autumn vegetable beef soup


With fall quickly approaching, I am getting excited about the thought of warm meals perfect for those soon to be crisp evenings. There is something so nice about coming in from a brisk fall day to a warm bowl of soup, so I decided to make a vegetable beef soup from leftovers of the roast I made last week. This meal is a perfect way to use up those leftover scraps to add flavor and depth for a good, hearty meal. The leftover vegetables and liquid make a savory broth base for this, and the meat adds flavor and protein. The great thing about soups and stews is that you can throw in what you have and adjust the amounts to your taste, as I did when I made this, instead of having exact amounts of ingredients. I made a large batch of this and froze it in several small batches for us to enjoy throughout the coming months. 
If you do not have a roast to use as part of this stew, simply buy some stew meat and extra beef broth. Saute the stew meat in some oil (you can coat it in flour if you prefer), along with the onion and garlic, dice up some extra carrots and potatoes, and prepare as follows.  This soup is great when served with cornbread.

Vegetable beef soup

I N G R E D I E N T S :
1 Tbsp. XVOO
1 Onion, diced
1 clove garlic, minced
28 oz diced tomatoes
Liquid from previous roast (I had around 1 1/2 cups)
Beef and vegetables remaining from previous roast
4 additional carrots, diced
4 additional potatoes, diced
1 cup water plus 2 cubes beef bouillon (I used 2 tsp. of Better than Bouillon paste), or 2 cups beef broth 
1 cup frozen corn
1 cup frozen green beans
1 bay leaf
2 splashes Worcestershire sauce
basil, oregano, basil, and parsley to taste (I just sprinkle some of all of them over the stew to add flavor)

D I R E C T I O N S :
In a large pot or dutch oven, saute onion and garlic in XVOO over medium-high heat until soft and transparent.
Add tomatoes, along with liquid you have from previous roast (I actually pureed 1 cup of the leftover vegetables with the liquid for a thicker base). If you do not have a roast, use 2 cups beef broth in place of this liquid. Add another cup of water along with bouillon cubes (or 2 tsp. better than bouillon), or two additional cups of beef broth.
Cut up leftover beef from roast into 1/2" squares, and add to liquid. If you do not have leftover roast, this is where you would add freshly cooked stew meat in.
Dice carrots and potatoes, and add to pot. If you have leftover vegetables from the roast, add these, too, because they give added flavor.  If you don't, you may want to add in some extra carrots and potatoes, depending on how thick you want your stew. Add corn and beans as well.
Add bay leaf, 2 splashes Worcestershire sauce, and oregano, basil, and parsley, and salt and pepper to taste. 
Bring to a boil on medium heat and quickly lower to simmer on low, covered for 1 hour or longer. 
Adjust seasonings, salt, and pepper as stew cooks. 


Tuesday, August 03, 2010

How to can tomatoes


Have you ever wanted to try canning tomatoes, but are intimidated or lack a pressure canner (or whatever it is called...)? Well, I have good news: It's not hard, and you don't need any special equipment. I did not know this until the other day when my husband's aunt had given me a lot of tomatoes-more than I could eat before we were going out of town-and said, casually, "you should just can some." "Me, can? I can't do that- I don't know how!" was pretty much my response as I envisioned something like glass jars exploding on my stove top. She proceeded to tell me how to do it, and before I knew it, I was saying, "you mean, that's all I have to do?" and writing the instructions down, step by step. I don't know a lot about canning, so I was happy to hear that you do not have to have any special pressure cookers or  canning devices to can tomatoes.

Canning tomatoes is simple, really. I have wanted to learn for sometime, and am so glad I tried it. I have 2 quarts of lovely looking canned tomatoes sitting on my counter as I type this, and I can't wait to use them. Now, I will admit that I don't have a garden, but I do have a toddler running around everywhere, so between those two things, I don't know that I'll be putting my newly acquired canning skills to much use again in the near future. Maybe one day when I have a garden or a few years down the road when we're out of the toddler phase. But, I certainly know what to do when someone gives me more tomatoes than I can eat, and there is nothing like fresh canned tomatoes in comparison to store bought. And, I now have an even greater appreciation for those lovely jars full of tomatoes and such given to me by people who do canning a lot.

So, if you would like to know how you, my friend, could can your own tomatoes, just follow these simple steps!

What you need:

Tomatoes (a lot. I probably used 15 medium-sized tomatoes to get two quarts.)
A large pot or dutch oven, or two. One for the tomatoes, an one for the jars to sterilize. And a smaller pan for the rings and lids to sterilize.
Glass canning jars, with NEW lids and rings (don't use old rings and lids because they won't seal properly) You can get all of this at the grocery store or any type of super center. 
Tongs
Ladle
Pot holders or a thick dish towel (my preference) to hold the hot jar as you ladle the tomatoes into it.
1 tsp. measuring spoon
sugar and salt. You'll use 1 tsp. of each per quart of tomatoes.

What to do:

Prepare stove top for canning: Take your clean glass jars, and place them upside down into a large pot filled with about 1-1/2 inches of water. Again, make sure to place the jars upside down in the pot, so that the steam rises within them during boiling and sterilizes them properly. If you have room, you can also put your lids and rings in the bottom of the pot. I did not have room, so I placed them in a separate smaller saucepan. Without any heat on, leave all of this be until the tomatoes are nearly finished cooking. You just want to have this set up to make things easier once it's time to really get down to business.


Start preparing the tomatoes by peeling, coring, and quartering the tomatoes, placing them in an empty pot or dutch oven as you go. This took me about 30 minutes total. 

Once finished, place the tomato filled pot or dutch oven over medium heat and slowly bring to a boil.

Once the tomatoes are boiling, turn the heat to low. Simmer on low, uncovered, for around 30 minutes, or until the  tomatoes turn a brilliant red. As my husband's aunt says, "you'll know when they've done this". Honestly, I couldn't really tell a color change, but I just simmered them on low for 30 minutes.

About 20 minutes into the tomatoes cooking, turn the stove eyes  that have the canning jars, rings, and lids on to medium-high. Bring those slowly to a boil as the tomatoes are finishing up cooking. This is easy, but just keep an eye on the jars. You'll see some bubbles rise out of the jars before the water is actually boiling. Once it is boiling, keep an eye out and make sure the water doesn't start rising up to the top (or bottom, actually) of the jars. If it does, just take the tongs and tip the glass jar momentarily to let the air escape, then place it back down upside down-this prevents too much water rising up and tipping over the jars. Once the water has started boiling, let it boil for 2 minutes so that the steam rises up in the jars and they are sufficiently sterilized. You need to do this right before you want to ladle the tomatoes into the jars, so do this near the end of those 30 minutes.

Now you are reading to get down to business and start canning! 

Carefully take one jar out of the water and place it right side up on the stove top. I used a thicker dish  towel to hold the jar in my hand because the jar is really hot but was sliding out of my tongs when I tried using them.
Once you have filled up the jar, place 1 tsp. each of salt and sugar into the jar. Do not stir, just let it rest on top. You can always gently shake the jar once everything has cooled to make sure the sugar and salt get evenly distributed, but I don't think that is really necessary.
Take your tongs and remove a lid from the boiling water. Place the lid on the jar, and then, using a towel or pot holder, screw on a ring from the boiling water. Don't do it so tightly that you'll never be able to get it off! After this has all sat for a little while, the lid should seal to where it won't pop when you press it down in the center, and the tomatoes will be preserved until use.

And that's it! Just repeat this until all your jars are full. Label your jars so you'll know when you canned them, if you are canning a lot. Enjoy freshly canned tomatoes in all sorts of soups and sauces!

Tuesday, July 20, 2010

Best ever cheesy new potatoes


This dish is delicious!! We had company over a couple of nights ago and I wish I would have doubled this recipe because I could have eaten twice as much. These are super simple and will be a go-to recipe for sure. This may not be the healthiest dish, but it is worth it. Trust me when I say you should make this!

Best ever cheesy new potatoes
Adapted from a from a recipe in Food for Thought
I N G R E D I E N T S :
10 coarsely chopped small new potatoes
1/2 cup chopped onion
1/2 cup sour cream
1/2 cup shredded Monterey Jack cheese
1/2 cup shredded Cheddar Cheese
1/2 tsp. salt
1/4 tsp. freshly ground black pepper (or 1/8 tsp. ground red pepper if you 
like more heat-I used black)
Optional, 1 medium tomato, seeded and chopped (my husband dislikes 
tomatoes so I left it out)

D I R E C T I O N S :
Preheat oven to 350 degrees.
In a large saucepan, cook the potatoes and chopped onion, covered, 
In a small amount of boiling water for 12-15 minutes, or until tender.
Drain potatoes. Stir in remaining ingredients.
Spoon into 1-quart rectangular baking dish.
Bake, uncovered, for 30 minutes, or until heated through.


Monday, July 19, 2010

Dill pickle chips


If you like dill pickles, you will love this recipe! This is the perfect time of year to try your hand at making pickles, because they are plentiful and inexpensive, and you may even have a friend with a garden overflowing them who would love to share some with you. These pickles are very easy to make, and no canning is required. 


Dill Pickle Chips
From Good Things Catered (click here for recipe)

Recipe originally from Martha Stewart
Makes 2 quarts

I N G R E D I E N T S :
2 lbs. Kirby pickles
3 Tbsp coarse salt (I use Kosher)
2 c. distilled white vinegar
1 Tbsp dill seed
4 cloves garlic
2 bunches fresh dill, coarsely chopped

D I R E C T I O N S :
-Cut the cucumbers into 1/2-inch-thick rounds, and transfer to a colander set in a bowl.
-Toss well with salt.
-Refrigerate cucumber rounds 1 hour.
-Rinse cucumber rounds well; drain.
-Pat dry between paper towels. Transfer cucumber slices to a large bowl.
-Bring 3 cups water, vinegar, dill seed, and garlic to a boil in a medium saucepan, stirring.
-Reduce heat; simmer 4 minutes.
-Let mixture cool slightly, about 10 minutes.
-Add chopped dill to cucumber slices, and toss to combine.
-Pour in the brine.
-Let cool completely, about 30 minutes.
-Transfer mixture to airtight container(s), and refrigerate at least 1 week (pickles will keep 3 weeks more).

Saturday, July 10, 2010

sweet potato fries


These are easy, easy, easy, plus healthy and delicious. Both kids and adults love them. The quantities are very flexible, depending on how many people you are serving. This would feed 3-4 people.

I N G R E D I E N T S :

3-4 large sweet potatoes
Oil- I use olive or safflower oil
kosher salt
pepper

D I R E C T I O N S :

Preheat oven to 425.

Cut potatoes into wedges or smaller, french fry size pieces.
Toss lightly with oil.
Spread across a baking sheet, and sprinkle with salt and pepper.
Bake for about 30 minutes, or until tender.

Thursday, July 01, 2010

Blender Cornbread


We love to have veggie nights out our house 2-3 times a week; it's easy on the wallet and the waste, and to me it's always a relief to not have to deal with making meat or some type of big main course. Cornbread is a great addition to a veggie night, and I just tried this new recipe. I've never made cornbread from actual corn kernels, but it was very easy and healthy because it's straight from fresh whole grains. This is a great way to prepare a whole grain quick bread without a grain mill; all you need is a blender. This recipe was a cinch and all I had to do was plan ahead and make the batter part in the morning so it could sit during the day before I baked it. We ate part of it for dinner and finished it up the next day at lunch!

Soaked Blender Cornbread

Adapted from Sue Gregg’s Meals In Minutes Cookbook
and courtesy of my friend Kelly
My comments / changes are in italics
I N G R E D I E N T S :
1 cup cultured milk or sour raw milk (plain yogurt thinned with a little water to consistency of buttermilk, or plain kefir, or buttermilk) (I actually used about 2/3 cup regular milk and 1/3 cup plain yogurt)
3 tablespoons maple syrup or honey (If you do not want your cornbread to be sweet, omit this)
2/3  cups dry popcorn corn (plain dried corn kernels)
2⁄3 cup whole wheat pastry grain or 2/3 c cup spelt grain ( I used whole wheat pastry flour)
1⁄₄ cup melted butter or melted coconut oil (I used butter but if you use coconut oil, add it gradually after getting the blender started)
2 eggs
2 teaspoons baking powder
1 teaspoon salt
1⁄₂ teaspoon baking soda


D I R E C T I O N S :
Place milk/yogurt combo or kefir or buttermilk, maple syrup or honey, whole popcorn kernels, grain, and butter in a blender (unless using coconut oil, then add gradually after blender is started). The blender will "grind" the corn kernels along with the other ingredients, leaving maybe just a slight grainy texture, but I didn't really notice any. It was very cake like in texture for me.

Blend all of that at high speed 3-5 minutes.

Cover blender and let stand at room temperature for 8-24 hours for improved nutritional value.Preheat oven to 325°.

Grease 8×8 glass baking pan with soft butter.

Blend in eggs for 2 or 3 minutes on high speed; combine baking powder, soda and salt; add them at the last, just to blend in.

Pour batter immediately into buttered baking pan.  
Bake for 25-35 minutes or until knife comes clean out of center (It only took me about 25-30 minutes).

Wednesday, June 23, 2010

Sweet Potato Burritos


If you are thinking "I don't know about this one...", don't stop reading. This is a good recipe. 

I have to admit: This dish didn't sound all that appetizing to me when I first heard about it. In fact, my fear was that it would probably taste too... "healthy".  You know what I mean. But, I've seen this recipe pop up a few different times on various blogs and have a good friend who loves it, so last night  I decided to give it a try. Even though the title of this dish didn't entice me, once I started looking through the ingredients, it sounded like it might be good and would surely be really healthy and interesting. The results? We all really liked it! It is surprisingly a great dish. It's super easy, super cheap, super quick, super healthy, and it even supposedly freezes very well. So, I would have to say that I was really impressed by this little recipe and will definitely make it again. It was also very filling; I made 4, thinking we would each eat two (with my child eating a little bit of mine), but we only ate 1 each and kept the other two for leftovers because we were full off of 1 burrito, some spanish rice, and steamed broccoli. This is a great dish to have for a veggie night, which we try to do 2-3 times a week, or even as a mexican type dinner. It's very similar to a bean and cheese burrito, but the sweet potato gives it extra flavor, a great texture, and, of course lots of nutrients.

Sweet potato burritos
Adapted from a recipe found here at All Recipes
I scaled the recipe down on the website to calculate the amounts needed for 4 servings, rather than 12.
The recipe below is for 4 servings.


I N G R E D I E NT S :

1 teaspoon vegetable oil ( I used XVOO)
1/3 onion, chopped
1-1/3 cloves garlic, minced
2 cups canned kidney beans, drained (I used dried kidney 
beans and soaked them overnight before cooking, but you 
can use canned if you like)
2/3 cup water
1 tablespoon chili powder
3/4 teaspoon ground cumin (I added a bit more)
1-1/4 teaspoons prepared mustard
1/3 pinch cayenne pepper, or to taste (I left this out)
1 tablespoon soy sauce
1-1/3 cups cooked and mashed sweet potatoes
4 (10 inch) flour tortillas, warmed
2-1/2 ounces shredded Cheddar cheese

D I R E C T I O N S :

Preheat oven to 350 degrees F.
Heat oil in a medium skillet, and saute onion and garlic 
until soft. Stir in beans, and mash. Gradually stir in water, 
and heat until warm. Remove from heat, and stir in the chili powder, cumin, mustard, cayenne pepper and soy 
sauce. Cook until thickened.Once I mashed the beans 
and onion, I added extra cumin, along with some salt, garlic 
powder, and onion powder for more flavor and really liked it. 

Divide bean mixture and mashed sweet potatoes evenly 
between the warm flour tortillas. Top with cheese. 
Fold up tortillas burrito style, and place on a baking sheet. 
I put cheddar cheese in the tortillas rather than on top. 
It's just a matter of preference.
Bake for 12 minutes in the preheated oven, and serve.

Thursday, May 20, 2010

healthy tasty smashed new potatoes


These are inexpensive, oh so easy, and oh so yummy! I made them up as I cooked them a few weeks ago, and my husband and dinner guests were very complimentary of them (which is kind of funny because I was honestly a bit worried they would not be that good!). There are no exact measurements, which makes it even easier.

smashed new potatoes

I N G R E D I E N T S :

new potatoes, with skin on (dice if in a hurry, or leave whole and boil for longer)
butter (not too much...just 1 Tbsp. or so), diced into small pieces
kosher or sea salt
freshly ground pepper
dash of garlic powder
chives (fresh is best but dried is just fine, too!)

D I R E C T I O N S:

Bring a medium-large saucepan of water to a boil. I add some salt to the water for extra flavor for the potatoes. If you are in a hurry, dice the new potatoes. If not, you can boil them whole (I just cut a little "x" shaped slit in the skin...but I don't think that is even necessary!), and it will just take longer. For diced new potatoes, boil for 10-20 minutes, and for whole new potatoes, it will probably take double that. Just check for tenderness periodically and continue boiling them until they are fork tender.

Once new potatoes are fork tender, remove the saucepan from heat and drain the water. add diced up butter throughout the potatoes. You don't want to use a whole lot of butter, because we are trying to keep these healthy, but about 1 Tbsp. should give enough flavor. If not, use a little more...just not too much :).

Toss potatoes together, gently smashing them a bit with a fork as you go. The point is not to make them smooth, but just very coarsley smashed. These are good, lumpy potatoes with the skin on!

Sprinkle salt, pepper, and a dash of garlic pepper over the potatoes. Toss potatoes to incorporate seasoning. Add some chopped chives, and toss a little bit more.

See, so easy. Great with fish, chicken, or just a veggie night.

Monday, May 03, 2010

Delicious and nutritious roasted carrots


I put this dish together last night, and we were really pleased with the results. I'll definitely be making these again. They are so flavorful, and I love the way the carrots are caramelized during roasting. A great change from the usual boiled or steamed version.

Roasted carrots

I N G R E D I E N T S :

Carrots (about 2-3 per person)
XVOO
kosher or sea salt
freshly ground black pepper
fresh rosemary sprigs (if you dislike rosemary, simply leave it out or try some different herbs)
honey

D I R E C T I O N S :
Preheat oven to 425 degrees.
Rinse and peel carrots. Cut into large pieces (I divided each carrot in half length and width wise).
In a baking dish, drizzle some XVOO to coat the bottom.
Place carrots in baking dish. Top with a few rosemary sprigs, and a sprinkle of salt and pepper.
Drizzle some honey and additional XVOO over top.
Roast, uncovered, for 30-45 minutes or until carrots are brown and tender but not overcooked.

Saturday, May 01, 2010

broccoli-spinach bake


I'm trying to use up what food we have in our home right now. Tonight we had homemade pizza, and I made this side for something green to go with it. It's very similar to broccoli casserole...but it has spinach, and since I hate the word "casserole" (I mean, does anyone really like that word?!?!), I'm calling this my broccoli-spinach bake. We really liked it, and my child couldn't get enough...which isn't bad for something consisting of broccoli and spinach.

Broccoli-Spinach Bake

I N G R E D I E N T S :
1 frozen package of broccoli
1 frozen package of chopped spinach
2 Tbsp. butter
5 or so slices cheddar cheese (about 5 ounces maybe?), divided into strips
bread crumbs

D I R E C T I O N S :
Preheat oven to 350 degrees. Place frozen broccoli and spinach into a medium or large saucepan with butter and 1/2 cup water. Bring to a boil over medium heat, and reduce to a low simmer. Cover, and let simmer for about 15 minutes, or until the broccoli is nice and tender. Add cheese and stir to combine. Cover and let cheese melt onto broccoli and spinach on low heat. Once melted, stir again. Place into a baking dish and sprinkle with bread crumbs. Bake for around 30 minutes.

Saturday, November 14, 2009

roasted butternut squash puree


This is a healthy and tasty side perfect for a fall meal. I use one butternut squash and don't even measure out the other ingredients.

roasted butternut squash puree
from real simple magazine
Serves 6-8
Hands-On Time: 20m
Total Time: 1hr 30m

I N G R E D I E N T S :

3 butternut squash (2 pounds each) (I just use one butternut squash for a dinner for 3)
1 1/2 teaspoons kosher salt
1/2 teaspoon black pepper
6 small shallots, halved (I've used these but this time all I had was a sweet onion and it was just as good)
4 tablespoons honey
6 sprigs fresh thyme
6 tablespoons unsalted butter (I used olive oil)

D I R E C T I O N S :

Heat oven to 400° F.
Trim the ends from the squash, then halve lengthwise, discarding the seeds.
Transfer the squash, cut-side up, to a rimmed baking sheet lined with parchment or foil.
Season with the salt and pepper and top with the shallots (or onion), honey, thyme, and butter (or olive oil).
Cover the squash with foil. Roast until softened, 45 to 60 minutes (I've actually found about 1 hr 10 minutes to be good for me with my oven, so cook for longer if it's not completely tender).
Uncover and set aside until cool enough to handle. Working in batches, scoop some of the softened squash and shallots from the peels into a food processor (I removed the sprigs of thyme before pureeing).
Puree the squash mixture until smooth. Transfer to a serving bowl. Repeat with the remaining squash and shallots. Serve warm.

Friday, November 13, 2009

Baked chicken with vegetables in white wine

Here is another easy dinner you can make with FROZEN chicken straight out of the bag. I'm trying to come up with lots of recipes to do this with because it makes for such little preparation and no having to clean up after handling slimy, raw chicken. This is a spinoff of the pork chops in white wine dish I've posted on here, and I got the idea of this variation from my sister. The end result is like a chicken version of a pot roast, complete with a very yummy sauce/gravy that is made from everything baking together. This is a nice one dish meal that is low fat, healthy, and a good combination of protein and vegetables. No picture this time but, like a pot roast, its aesthetic qualities just wouldn't do it justice. Enjoy!

baked chicken with vegetables in white wine

I N G R E D I E N T S :

2-3 pieces of frozen chicken (or more if they are small and will fit into a 9X12 dish)
4 carrots (or more, or less...), peeled and cut into 2-3" long pieces
1 onion, chopped
2 pieces of celery, cut into 2-3" long pieces
3 baking potatoes or several small new potatoes. peel baking potatoes but you don't have to peel the new potatoes, and cut into chunks.
1/3-1 cup white cooking wine (you can use 1 cup and less broth but I only had 1/3 cup)
1 tsp soy sauce (my sister uses 2 Tbsp and likes it, so you might want to try more for more flavor).
1 cup chicken broth or 1 cup water with 1 bullion cube (you can also omit this or use less, and use more cooking wine)
salt and pepper to taste

D I R E C T I O N S

Preheat oven to 350.

Clean, peel, and chop the vegetables while oven preheats.

In a 9x12 pan, place frozen chicken breasts. Place vegetables on top. Season with salt and pepper.

Mix wine, broth, and soy sauce together. Pour over vegetables and chicken.

Cover dish with foil, and bake at 350 for 1 1/2-2 hours, or until chicken is done. If you cook it a little longer than you need, it's okay-like a roast, the chicken just seems to get more tender as it cooks in the sauce.

Monday, November 02, 2009

savory white bean soup


I tried a new recipe the other night that I've had tucked away in my recipe folder for about three years now. I've been wanting to try it, but just now got to it. My main reason for never making it was that I've never cooked greens of any sort, and this calls for mustard greens or kale. Well, it just so happens that a friend of mine gave me her portion of CSA produce this past week, and low and behold, I got a bag full of kale. Not knowing what to do with it, I remembered this recipe. I don't know why I was hesitant to cook greens...they are very easy and really tasty! It was so easy to wilt them, just like spinach...and spinach could probably even be substituted in this recipe.
Anyway, when I found this recipe in Real Simple, I thought it looked delicious and healthy, and I was very pleased with the results! My whole family liked it. The original recipe is titled "stewy white beans", but mine came out much more like an italian type soup. I will definitely make this recipe again in the future, because it is very nutritious, full of good flavor, and very easy to make, but I may try doubling the amount of white beans for added protein.
Here is the original recipe, and below is my adapted one. This soup is also great topped with parmesan cheese and served with focaccia bread.

savory white bean soup
adapted from "stewy white beans" recipe found in Real Simple Magazine

I N G R E D I E N T S :

2 tablespoons olive oil
1/2 of a sweet onion, finely chopped (or two small shallots, finely chopped...my grocery store was out)
2 cloves garlic, finely chopped
1 pound mustard greens or kale, stems removed and leaves sliced into 1-inch strips (I used a big bunch of Kale)
juice from 1 lemon
2 teaspoons light brown sugar
1 bay leaf
1 14.5-ounce can vegetable broth
1 28-ounce can whole or diced tomatoes, undrained
1 or 2 15-ounce cans white beans, drained (I used 1 can this time and it was fine but I think I would like an extra can)
1 1/2 teaspoons kosher salt
1/2 teaspoon black pepper

D I R E C T I O N S :

Heat the oil in a large pot over medium-low heat.
Add the shallots and cook for 4 minutes.
Add the garlic and greens and cook, stirring frequently, until the greens begin to wilt, 3 to 5 minutes.
Add 1 tablespoon of the lemon juice, the brown sugar, bay leaf, red pepper, broth, and tomatoes and their juices.
Bring to a boil.
Reduce heat and simmer gently until the greens are tender, about 15 minutes.
Add the beans and cook for 5 minutes.
Remove and discard the bay leaf.
Season with the salt, black pepper, and (if desired) the remaining lemon juice.