Wednesday, June 11, 2014

Delicious whole wheat blueberry muffins


For my third recipe in the grain mill challenge, I wanted to make blueberry muffins for breakfast, and came across a recipe that looked good on Pinterest. I thought they would be good, but I didn’t imagine that they would be as good as they were! These are now my favorite blueberry muffins, and my whole family agrees. They are healthy, but they have such a wonderful flavor. They are moist, not too dense, and sweet but not so sweet that you feel like you are having cake for breakfast. I used coconut oil for its health benefits and I think that it also enhanced the flavor with its subtle taste. I was surprised that these do not have egg in them, as most muffin recipes I’ve made usually call for egg. I wondered if they would bind together well without it, and they did. I didn’t have any brown sugar, so I used a mixture of sucanat and regular organic sugar, and I loved the amount of sweetness. These were incredibly easy to make and I found that flavor to be perfect. I am so glad I found this recipe-it is a must try!
100% Whole Wheat Blueberry Muffins
Slightly adapted from a recipe I found here and originally adapted from King Arthur Flour
I N G R E D I E N T S :
2 1/4 cups white whole wheat flour (I used freshly milled soft white wheat flour but you can you store-bought wheat if you prefer to)
1 cup (7 1/2 oz) packed light brown sugar (I didn’t have any brown sugar so I used 3/4 cup sucanat and 1/4 cup organic sugar)
1 teaspoon baking powder
3/4 teaspoon salt
1/2 teaspoon baking soda
1 cup fresh blueberries (use either fresh or unthawed frozen berries)
1/3 cup coconut oil
1 1/2 cups buttermilk, at room temperature
1 teaspoon vanilla extract
sugar and cinnamon to sprinkle on top
D I R E C T I O N  S :
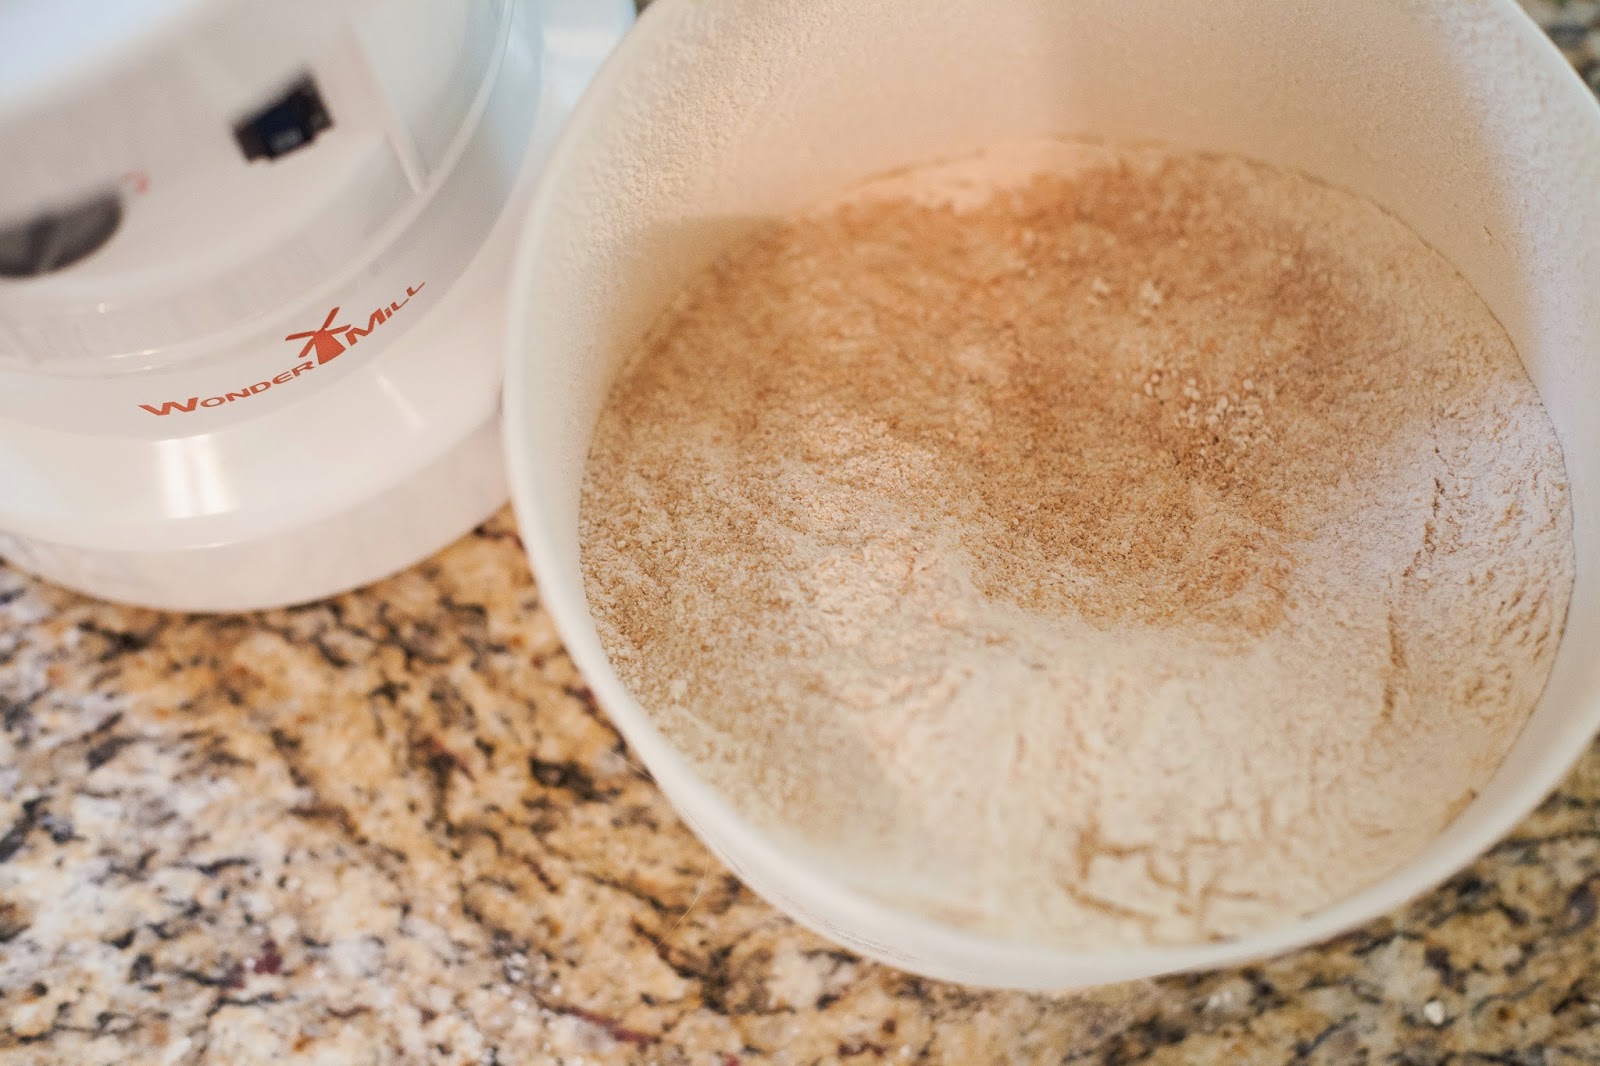
If milling flour, mill enough soft white wheat berries for 2 1/4 cups flour. I usually mill a larger amount of flour every so often, and store what I don’t use in the freezer (to better preserve it) rather than milling it each time beforehand.
Preheat oven to 400 F. Line muffin pan with paper liners.
In a medium bowl, whisk together the flour, sugar, baking powder, salt, and baking soda. Be sure to break up any clumps of brown sugar. Stir in the blueberries. Add the coconut oil, buttermilk, and vanilla to a measuring cup and whisk to combine. Pour the wet ingredients over the dry and stir just until they are incorporated.
Divide the batter evenly among the prepared liners, filling each about 3/4-full. Lightly sprinkle a small amount of cinnamon and sugar over each muffin. Bake for about 15-18 minutes, or until the tops of the muffins spring back when lightly pressed with your fingertip, and a toothpick inserted in the center comes out clean. Transfer the pan to a wire rack and allow the muffins to cool for a few minutes before removing them to the rack. 

Monday, June 09, 2014

Grain Mill Challenge :: Delicious whole wheat bread


I'm blogging again today at Grain Mill Wagon as a part of their grain mill challenge.


I’ve made whole wheat bread on and off for a few years now, but I have often come away with bread that tastes good but easily falls apart. Such was the case recently, so I opted to try a new recipe. I am very happy with this one and will continue to use it. The flavor and texture was great, the bread held together well, and I loved that even though it is 100% whole wheat, it was soft, moist and not too dense. Prior to trying this new recipe, I tried another recipe and used all soft white wheat, but a friend suggested combining soft and hard wheat together for better results. The store I purchase my wheat berries at does not sell hard white wheat, so I combined soft white and hard red, and was very pleased with the results. I also used coconut oil for its health benefits. This bread can be made using soaked flour, but I did not soak mine.
Whole wheat bread
Recipe found here by Simple Country Home
I  N G R E D I E N T S :
6 cups whole wheat flour (I used 2 cups of freshly milled hard red flour and 4 cups freshly milled soft white flour)
2 1/2 cups warm water (water temperature should be around 110 F)
4 tsp dry active yeast (I use bread machine yeast)
1/3 cup honey
1/3 cup oil (I used coconut)
1 Tbsp. salt
3 Tbsp. vital wheat gluten
D I R E C T I O N S : 
Mill your grains.


Combine the water, yeast, and 2 cups of flour, let it sit for 15 minutes.

Add the rest of the ingredients, slowly adding in the last cup of flour. Depending on your altitude and humidity you will need anywhere from five and a half to six and a half cups of flour. If you are using a mixer, mix on low, the dough should pull off the sides, form a ball on the hook, and the sides should be clean. The picture on the right doesn’t have enough flour yet, the bowl is not clean.
To develop the gluten, which is what gives you soft, pliable bread, you need to alternate kneading and letting the dough rest. Once the dough is formed and pulling away from the sides of your mixer, turn it off and let it sit for 10-20 minutes.
Turn the mixer back on, the lowest speed, and knead for 5-10 minutes.
Divide the dough in half, and form the loaves. I just roll the dough between my hands to make a log that is the same length as the bread pan.

Grease your pans with butter or oil and set the bread in them to rise for about 1 hour. I set mine on top of the oven and cover them with a damp towel.
Preheat your oven to 350.
When the loaves have risen about 1 and 1/2″ above the pan, put them in the oven and bake for 30 minutes.
Let them cool for an hour.

Tuesday, May 13, 2014

Grain Mill Challenge :: Whole wheat pizza dough

I received a grain mill in the mail from WonderMill in exchange for participating in their grain mill challenge and sharing what I make on their blog. Today was my first recipe post! Here is the link:
Whole wheat pizza dough

Monday, March 31, 2014

delicious roasted sweet potatoes


We eat a lot of sweet potatoes, but I had been getting bored with our usual baked and mashed dishes. I decided to try toasting them, and they are now my new favorite way to prepare sweet potatoes.  This is an incredibly easy, yummy side dish. A little bit of oil and some salt is all it takes to enhance the flavor, and roasting really brings out their sweetness, giving them slightly crispy edges while keeping the interior really soft. They almost taste caramelized. I love this dish. It's super easy, tastes great and cooks pretty quickly.

Roasted Sweet Potatoes

I N G R E D I E N T S :

3-4 sweet potatoes
XVOO or coconut oil
Salt (I use sea salt)


D I R E C T I O N S :
Preheat oven to 425
Rinse, peel and dice potatoes.
Place potatoes in a bowl and coat in a small amount of XVOO.
Spread potatoes in a baking pan (I line my pan with parchment paper-just check to make sure yours is okay for that high of a temperature if you decide to use it).
Sprinkle generously with salt.
Bake for 30-35 minutes, until the edges are browned and insides are soft, tossing once during cooking.

Wednesday, January 22, 2014

Coconut oil chocolate chip cookies


Oh, these cookies are so good! I have been wanting to make chocolate chip cookies with coconut oil for months now, and I finally found a good recipe for them on Pinterest. These cookies had a great flavor and turned out perfectly. I love the subtle flavor that the coconut oil adds-that alone is worth using coconut oil over butter! The directions call for refrigerating the dough prior to baking, which is definitely a must when using coconut oil-I know, because I had a huge fail the first time I tried to make cookies with the oil and didn't refrigerate it! These were easy to make and my whole family loved them. 
The original recipe is linked below and has a wealth of information on baking with coconut oil, uses for  the oil, etc. 

Coconut oil chocolate chip cookies
Original recipe here

1/2 cup virgin coconut oil, softened
1/2 cup white sugar
1/2 cup brown sugar, packed
1 egg
1 1/2 tsp. vanilla extract/powder (I used extract)
1 1/3 cup all-purpose flour (plus more if needed)
2 Tbsp corn starch (original recipe says this is a key ingredient)
1 tsp baking soda
1/4 tsp salt
1 cup chocolate chips

Cream together softened coconut oil (it should have a consistency of softened butter), sugars, eggs, and vanilla extract with your mixer until light and fluffy (5 minutes).

Add flour, corn starch, baking soda, and salt and mix in until just combined. If the dough seems to be thin and oily, add 1-2 more Tbsp of flour (I did not have to do this). Fold in chocolate chips by hand.

Divide the dough into 16 equal parts and roll them into slightly flattened balls (chilled dough will be difficult to re-shape). Cover with plastic wrap and chill the dough balls for at least 2 hours, or overnight (I chilled them for 2 hours and it was plenty of time). 

Preheat oven to 350 F and place chilled dough balls 2 inches apart on a lined baking sheet (I used parchment paper. The original recipes says that when using coconut oil unlined sheets always resulted in too dark cookie bottoms for her). 

Bake for 9-11 minutes until the edges are just set. Centers can still look slightly uncooked.

Cool cookies on the baking sheet for about 10 minutes. Store airtight.

Wednesday, January 15, 2014

Homemade vegetable beef soup


I have wanted to find a favorite vegetable beef soup recipe for some time now, and I think I finally have. I had the best vegetable beef soup at a restaurant this past fall, and asked the waiter what all they put in it. After looking around online and including what they mentioned, I played around with a recipe that I've now made twice, and we all love it. It's just a traditional vegetable beef soup but I love the flavor. The combination of chicken and beef broth along with vegetable juice is one I love because it gives a great flavor but isn't too beefy or tomatoey. I also used a sweet potato instead of a white one, not knowing how it would turn out, and we loved it. It adds a subtle sweet yet savory flavor to the soup, but is not at all overwhelming- just a good, healthy addition that I'll use from now on. This soup is very quick and easy to make and it makes enough for the four of us to have for two meals.  Pasta could also be added to make it go further. I didn't measure out my spices but sprinkled them generously over the soup. We had this for dinner but it also makes great leftovers for lunch. I would love to double this next time and freeze half of it.

Vegetable beef soup

I N G R E D I E N T S :
2 Tbsp XVOO (could also use vegetable oil, I just use olive oil because it's healthy)
1 medium-large onion, diced
2 cloves garlic, minced
1 lb beef
28 ounces tomato (roughly chop up a can of whole tomatoes or buy diced), drained
15 oz chicken broth
15 oz beef broth
1 Tbsp. better than bouillon chicken base  (I know this stuff isn't nutritious but it gives great flavor!)
1/2 Tbsp. better than bouillon beef base
1 1/2 cups vegetable juice, like V-8
28 ounces frozen vegetables (I used a mix of corn, green beans, peas, carrots, etc)
1 cup frozen lima beans (you can also add more of other frozen vegetables, too)
1 sweet potato, diced
dash of Worcestershire sauce
1 tsp. salt
1/2 tsp. pepper (add more if you like)
Garlic powder
Onion powder
Oregano, dried
Basil, dried
Parsley, dried
Parmesan cheese, to sprinkle on top of soup
Ciabatta or any other good bread, or crackers for serving along with soup.

D I R E C T I O N S :
Heat oil over medium-high heat and sauté onion and garlic until onion is translucent and garlic is turning a golden color. 
Add ground beef and brown until completely cooked. Drain all excess oil.
Add tomatoes, broth, chicken and beef bases, vegetable juice, vegetables, Worcestershire sauce, salt and pepper to pot. Generously sprinkle remaining spices over the soup (going a little lighter on the garlic and onion powders). Bring back to a boil on medium heat, and then let simmer on medium-low for 10-15 minutes, or until vegetables are tender. 
Adjust seasonings to taste.
I find it best to let the soup sit on low for a little while to continue to let the flavors combine, so I'll make this a couple of hours before dinner. 
Top individual bowls with a small amount of parmesan cheese, and serve with bread or crackers. I took a loaf of ciabatta, cut it in half to make two long slices, and brushed it with melted butter before sprinkling it with a very small amount of garlic powder and salt and topping with a little parmesan. I baked it on 350 for 10-15 minutes until the edges were just turning brown, and it was a great addition to the soup. 


Wednesday, January 08, 2014

Homemade granola

I had been wanting to make some granola for breakfast because we are always buying the packaged kind, and the homemade version is healthier and definitely less processed. I made this and it is delicious. I use coconut oil and combined honey and maple syrup, and loved the flavor. The dried fruit adds a sweet and tart punch and I especially love the addition of dried cherries. You could also use other types of nuts and seeds to your liking. The amounts of what I add in often varies, depending on what I have and after making it numerous times, I just eyeball the amounts rather than measuring out every single ingredient exactly. We love this recipe and I make it weekly! It is healthy, filling, and  my husband and I have both found that our blood sugar feels so much better after eating it than when we eat packaged cereal. It's great served as cereal with milk and also over yogurt with fresh fruit. And I haven't made any granola bars with this recipe yet, but I am sure they would be great as well. I find most of the ingredients from the Earth Fare bulk bins unless I buy them in bulk at Costco (which is where I find my coconut and grape seed oils, sliced almonds, maple syrup and dried fruit).

Homemade granola

I N G R E D I E N T S :
3-4 cups oats
1 cup sliced almonds
1/2 cup raw pumpkin seeds
1/2 cup sunflower seeds
1/2 cup dried cranberries, cherries, and /or raisins (I use all three but you could use less to cut out sugar)
1 cup unsweetened shredded coconut (I find unsweetened at earth fare in containers near the bulk bins)
1/4 cup golden flax seeds (if I have them)
2 Tbsp chia seeds (if I have them-I buy them in bulk at Costco)
1/2-1/3 cup Tbsp. coconut oil (if I'm out of coconut oil, I use grape seed oil and it's good, too)
1/4 cup raw honey
1/4 cup maple syrup
1/2 tsp vanilla extract
1 large pinch sea salt-I use Real Salt from Earth Fare in the bulk bin because it has more minerals
ground cinnamon

Preheat oven to 300 degrees F.
Combine oats, nuts, seeds, dried fruit and shredded coconut in a bowl and mix.
Add coconut oil, honey, maple syrup, and vanilla and mix until well combined.
Line a baking sheet with parchment paper and place granola onto it in an even layer. If you've made   a large batch and it's making a pretty thick layer on the pan, sometimes using two pans works better. Sprinkle with salt and cinnamon. 
Bake on 300 degrees for 20 minutes or until granola is a golden brown, tossing once or twice during cooking to keep it from forming large chunks. I usually let it bake for 10 minutes and then toss around and bake for 10 more. You want to make sure to not overcook it or it will taste too done. It's usually good when the edges are turning a light brown, but you don't want it to be very brown all over, or it will taste overcooked.
Let cool and store in an air tight container at room temperature for up to 2 weeks.

Tuesday, January 07, 2014

Favorite roasted chicken


It has been so long since I have posted any recipes! I love keeping this little blog as a way to share recipes I like with my friends, and also because I often find myself referencing it at dinner time to look up a recipe I'm making, so it's a great way to keep record of them. I have several recipes I've been meaning to post, so hopefully they will all make their way onto here soon.
I made this roasted chicken recipe several weeks back, and absolutely loved it. I have made other chicken recipes that have been good, but I'm always wishing they had a little more flavor. So far, this is my favorite roasted chicken recipe because I love the amount of flavor in it. I have also started using sweet potatoes in addition to or even instead of regular potatoes, and they might be my favorite part of the entire dish. I love the sweet flavor of the potato combined with the savory flavors from the chicken and seasonings. I am so happy with this chicken that it will definitely be my go-to recipe from now on, so I wanted to share it. Roasted chicken is nice in that it is so adaptable to personal taste and doesn't require exact amounts of things. I tend to use a lot of seasoning so that it has flavor and I also try to get as much seasoning underneath the skin as I can.  My measurements are not exact, just approximate amounts. I made it again last night and had to share it, so here is the recipe!

Roasted chicken

I N G R E D I E N T S :

1 3 lb pound whole chicken, giblets removed
5 cloves garlic, 4 whole and one minced
Juice of one lemon plus 1 other whole lemon, cut in half
2 Tbsp. butter, melted
2 Tbsp olive oil
1 onion
4 carrots, peeled and cut into 2-3 pieces each (you can add more if you have room)
2-3 sweet potatoes and one regular potato if you wish, peeled and sliced into half-inch slices
Salt
Pepper
Thyme (I use powder)
Parsley (I used dried)
Paprika
White wine (or white cooking wine-what I used)

D I R E C T I O N S :

Preheat oven to 375 degrees F.
Cut onion into several large chunks and place on the bottom of a 9x12 pan.
Melt butter and combine with olive oil and the juice of one lemon.
Remove any giblets and stuff cavity with 4 cloves of garlic and 1-2 halves of the other lemon, plus a small amount of the butter/oil/lemon combination.
Place the whole chicken on top of the onion. If you wish, tie legs with kitchen twine and tuck wings underneath the body of the chicken.
Make a spice rub with the salt, pepper, minced garlic, thyme, and parsley. I do not use exact amounts but if I had to guess, I would say I used around 1/2 Tbsp. each salt and pepper and then generously sprinkled in the thyme, parsley and minced garlic. Add a small amount of oil or butter to the rub to make a paste, and rub generously over entire chicken. I try to lift up as much skin as I can to rub it underneath so that the actual meat has flavor and not just the skin.
Place carrot and potato slices around chicken.
Drizzle oil/butter/lemon mixture and a little bit of cooking wine over chicken and vegetables.
Lightly season entire dish with a little more salt, pepper, parsley and some paprika before placing in the oven.
Cook on 375 for 1 1/2-2 hours, checking occasionally to make sure the skin isn't getting too brown.
If it is, tent it with foil. You might also want to turn the potatoes or spoon some of the liquid over them mid-way during the cooking so they don't get dried out on one side.
Cook until juices run clear and making sure the temperature in the thickest part of the thigh registers 170 degrees F.


Thursday, July 11, 2013

simple baked squash


This recipe is almost embarrassingly simple but something I make several times a summer when we have lots of squash. It's a very basic recipe and a nice, easy vegetable dish that we always like. We like to do veggie nights and in the summer they are great-some squash, pinto beans, corn bread, sweet potatoes, and fresh tomatoes and cucumbers all make a great meal. Last night I served this with bbq chicken, mashed potatoes and cucumbers and tomatoes.

Baked Squash

I N G R E D I E N T S :
Several squash...4-5 big ones or 8 or so little ones
1 1/2 cups milk
1/2 cup corn meal
1/2 cup all-purpose flour
salt
pepper

D I R E C T I O N S :
Preheat oven to 350.
In one dish place milk, and in another place mixed cornmeal and flour.
Wash and slice squash-I try to slice it very thin-less than 1/4".
Dip squash in milk, then coat in flour mixture.
Place on baking sheet and sprinkle with salt and pepper.
Bake for 30 minutes, then turn each slice over and bake another 30 minutes.
Squash should be soft and golden.


Friday, June 28, 2013

summer fresh peach pie


One of my favorite things about summer is all of the fresh, local produce. This past weekend, I took my girls to a local produce stand and bought a bunch of peaches. One of my daughters was especially excited about making a peach pie, so that is what we did on Saturday. I love peach pie. Love it. But, I don't think I had ever made one, and if I had, it's been so long that I don't even remember. After looking through some recipes, I came up with this version, and it was delicious. I was originally going to use a store bought crust, but realized I only had one and needed two, so decided to make my own. I used to make crusts from scratch often, but hadn't in a while (I tend to love shortcuts these days!). This one was worth it-it was so good. And my girls loved playing with the extra dough, rolling pin, and lattice cutter. Who needs play doh when you have all of that?

This pie is so good. Do yourself a favor and make one!

Because I didn't have enough peaches, I halved the recipe for the filling. It was plenty for a regular pie dish but for a deep dish, you would want to use the full amount. I had a deep dish pie plate and could have filled it with to the top had I had the full amount!

Peach pie
Adapted from this recipe at Two Peas and Their Pod
Crust adapted from one in my Better Homes and Garden Cookbook
(I'm sure the crust from the Two Peas site is good, I just didn't have all of the ingredients).

I N G R E D I E N  T S :

For the filling:
8 cups sliced peaches, skin removed
1/2 cup granulated sugar

1 teaspoon ground cinnamon

1/4 teaspoon ground nutmeg (I did not use)

3-4 tablespoons cornstarch, depending on how juicy your peaches are 
1/2 teaspoon vanilla extract


For the crust:
2 1/4 cups all-purpose flour
3/4 tsp salt
2/3 cup butter
8-10 Tbsp. cold water
1 egg, whisked, plus 1 Tbsp water for egg wash
sugar for sprinkling on crust

D I R E C T I O N S :

Begin by assembling crust. I prepared my dough in advance and refrigerated it for a couple of hours.

In a medium bowl stir together flour and salt. Using a pastry blender, cut in shortening until pieces are pea size.

Sprinkle 1 Tbsp of water over part of the flour mixture; toss with a fork. Push moistened pastry to side of bowl. Repeat moistening flour mixture, using 1 Tbsp of the water at a time, until flour mixture is moistened. Divide pastry in half; form halves into balls. 

On a lightly floured sufrace, use your hands to slightly flatten one pastry ball. Roll it from center to edges into a circle 12 inches in diameter. 

Wrap pastry circle around the rolling pin. Unroll pastry into a 9-iunch pie plate. Ease pastry into pie plate without stretching it. Trim pastry even with rim of pie plate. Transfer desired filling to pastry-lined pie plate.

Peel and dice peaches into large chunks. Add remaining ingredients and stir until combined.

Roll remaining ball into a circle 12 inches in diameter. Cut slits in pastry. 

Place pastry on filling; trim to 1/2 inch beyond edge of plate. Fold top pastry under bottom pastry. Crimp edge as desired.

For a lattice-top pie: (You could google a video for this or at least a picture of how to do it if you aren't sure)  Prepare as at left, except trim bottom pastry to 1/2 inch begone edge of pie plate. Roll out remaining pastry and cut into 1/2" wide strips. Transfer desired filling to pastry-lined pie plate. Weave strips over filling in a lattice pattern. Press strip end into bottom pastry rim. Fold bottom pastry over strip ends. 

Brush egg wash over top pastry and sprinkle with sugar.

Bake in a 400 degrees F oven for 45 minutes or until the pie is bubbling and the crust is golden brown. Let the pie cool completely on a wire cooling rack before cutting.

Serve with vanilla ice cream!