Showing posts with label bread. Show all posts

Monday, June 09, 2014

Grain Mill Challenge :: Delicious whole wheat bread


I'm blogging again today at Grain Mill Wagon as a part of their grain mill challenge.


I’ve made whole wheat bread on and off for a few years now, but I have often come away with bread that tastes good but easily falls apart. Such was the case recently, so I opted to try a new recipe. I am very happy with this one and will continue to use it. The flavor and texture was great, the bread held together well, and I loved that even though it is 100% whole wheat, it was soft, moist and not too dense. Prior to trying this new recipe, I tried another recipe and used all soft white wheat, but a friend suggested combining soft and hard wheat together for better results. The store I purchase my wheat berries at does not sell hard white wheat, so I combined soft white and hard red, and was very pleased with the results. I also used coconut oil for its health benefits. This bread can be made using soaked flour, but I did not soak mine.
Whole wheat bread
Recipe found here by Simple Country Home
I  N G R E D I E N T S :
6 cups whole wheat flour (I used 2 cups of freshly milled hard red flour and 4 cups freshly milled soft white flour)
2 1/2 cups warm water (water temperature should be around 110 F)
4 tsp dry active yeast (I use bread machine yeast)
1/3 cup honey
1/3 cup oil (I used coconut)
1 Tbsp. salt
3 Tbsp. vital wheat gluten
D I R E C T I O N S : 
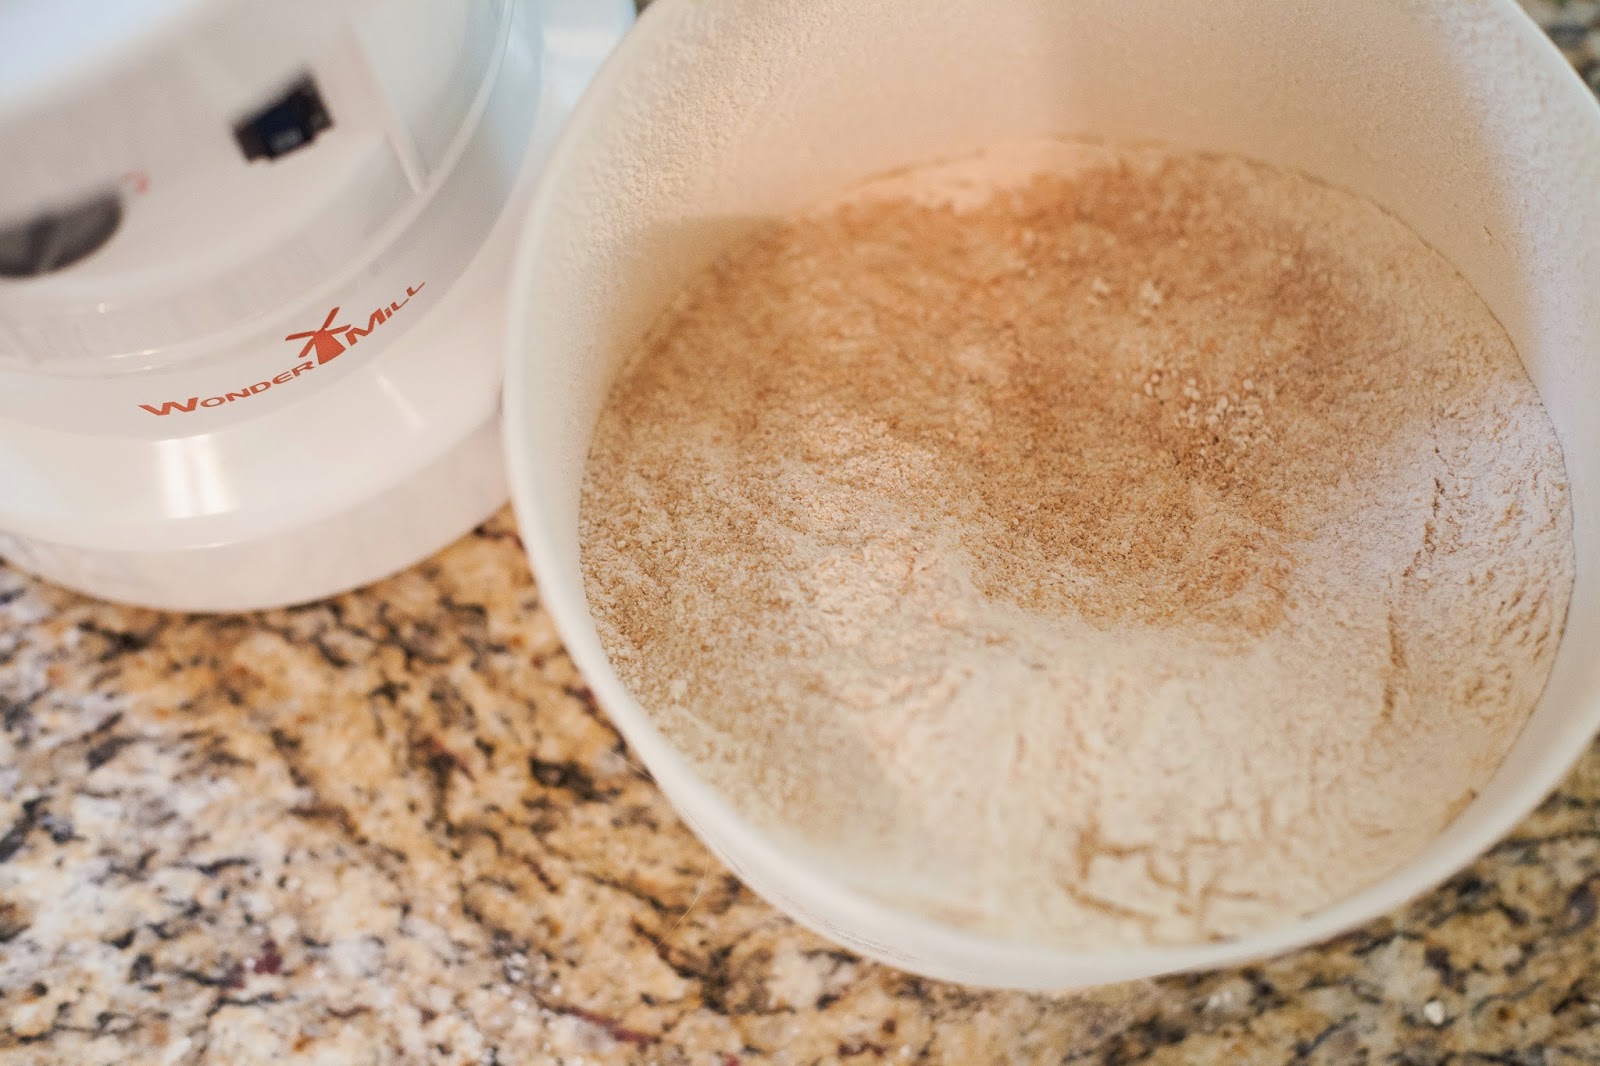
Mill your grains.


Combine the water, yeast, and 2 cups of flour, let it sit for 15 minutes.

Add the rest of the ingredients, slowly adding in the last cup of flour. Depending on your altitude and humidity you will need anywhere from five and a half to six and a half cups of flour. If you are using a mixer, mix on low, the dough should pull off the sides, form a ball on the hook, and the sides should be clean. The picture on the right doesn’t have enough flour yet, the bowl is not clean.
To develop the gluten, which is what gives you soft, pliable bread, you need to alternate kneading and letting the dough rest. Once the dough is formed and pulling away from the sides of your mixer, turn it off and let it sit for 10-20 minutes.
Turn the mixer back on, the lowest speed, and knead for 5-10 minutes.
Divide the dough in half, and form the loaves. I just roll the dough between my hands to make a log that is the same length as the bread pan.

Grease your pans with butter or oil and set the bread in them to rise for about 1 hour. I set mine on top of the oven and cover them with a damp towel.
Preheat your oven to 350.
When the loaves have risen about 1 and 1/2″ above the pan, put them in the oven and bake for 30 minutes.
Let them cool for an hour.

Tuesday, May 13, 2014

Grain Mill Challenge :: Whole wheat pizza dough

I received a grain mill in the mail from WonderMill in exchange for participating in their grain mill challenge and sharing what I make on their blog. Today was my first recipe post! Here is the link:
Whole wheat pizza dough

Wednesday, February 27, 2013

focaccia with coarse salt


Warning: The instructions look long, but trust me, this is not very complicated to make! 
I made this bread several weeks ago when I made the tortellini soup I recently posted about. The first time, it didn't turn out (it just never rose), but I've made it twice since then and it turned out much better. I'm not sure what happened the first time, but I figure it must have been something on my end if I've made it twice since then and it has been good. It actually tasted really good the first time, but was just too dense.
I've made another focaccia recipe before, but like this one a lot better. I haven't gotten it to rise quite as high, but it's more moist than the past recipe I've used, so I much prefer it to the old one. This bread is perfect for dipping in soup. The original recipe calls for adding rosemary, but I don't have any so I just used the coarse sea salt. It was a great addition to our soup dinner each time we've had it (even the first time, when it didn't rise high...it still gave a good soft crouton effect ;)!) 
This recipe is super easy to make. I love the book I got this one from-everything I've made from it is so good, including a pizza dough recipe that is my new all-time favorite, and I'm going to share it soon.
Try this recipe! It's super tasty with soup, perfect for a warm winter meal. It takes a little forethought to plan it out because it rises overnight, but other than it is easy as pie! The directions look long and complicated, but really they are not at all. I've found this true for all of the recipes I've tried from her book. She is very thorough but her recipes are actually very forgiving.
For those of you who may find this helpful, I've jotted down the times on when I did each step-it might help you plan out when to start things. When I do this timing, my bread is done by 5:30PM.

{ROSEMARY} FOCACCIA WITH COARSE SALT
From Kneadlessly Simple by Nancy Baggett

I N G R E D I  E N T S :
2 3/4 cups (13.75 oz) unbleached all-purpose flour, plus more as needed
2 Tbsp fresh rosemary needles (remove the stems), chopped fairly fine (I left this out)
3/4 tsp table salt
1 tsp. instant, fast rising, or bread machine yeast (I use bread machine yeast)
1 1/3 cups plus 1/2 tsp ice water, plus more as needed
2 Tbsp. olive oil, divided, plus more as needed
3/4 teaspoon sea salt or other coarse crystal salt

D I R E C T I O  N S :
First rise (I do this right before bed, usually around 10pm): In a large bowl, thoroughly stir together the flour, rosemary (if using), table salt, and yeast. Vigorously stir in the water, scraping down the dough and mixing until the dough is thoroughly blended. Vigorously stir in 1 Tbsp, of the olive oil. If the mixture is too dry to blend together, stir in just enough more ice water to facilitate mixing, but don't over-moisten, as the dough should be slightly stiff. If too wet, stir in enough more flour to firm it slightly (I think the first time I may have added too much more flour and that's what went wrong, so add some but not too, too much). Evenly brush the top lightly with oil. Cover the bowl with plastic wrap. If desired, for best flavor or for convenience, you can refrigerate the dough for 3-10 hours (I did not do this). Then let rise at cool room temperature for 12-18 hours. If convenient, vigorously stir the dough partway through the rise (If I remember, I do this when I wake up in the morning, but I don't think it makes much of a difference).

Second rise (I do this after lunch, usually around 1PM): Brush a 15x10x1-inch (or similar-I use a cake pan that is a little deeper) baking pan with olive oil, then line the pan with baking parchment (I do not do this because the parchment paper I have cannot go up to the temperature she calls for baking at-so check your label. I just oil the pan by itself). Brush the parchment (if using) with olive oil. Using a well-oiled rubber spatula, turn the dough out onto the pan; try not to deflate it any more than necessary. Drizzle the dough with 1 Tbsp. of olive oil. With well-oiled hands, lightly pat and press out the dough until it is evenly thick and extends to within 1 inch of the edges all around. Tent the pan with nonstick spray-coated plastic wrap (to do this, I usually place the dough in a cake pan that has enough height to where the plastic wrap does not touch the dough.  I spray it with spray, then pull it tight over the top of the pan so that it is just sitting on top of the pan but not touching the dough.)

Let rise using either of these methods: For a 2 1/2-3 1/2 hour regular rise (this is what I do), let stand at warm room temperature; or for an extended rise, refrigerate for 4-24 hours, then set out at room temperature. Continue the rise until the dough has almost doubled from the deflated size (If the pan has a 1" rim, the dough should be 1/4" below it.) Just before baking, with oiled fingertips, make deep indentations, or dimples, all over the dough. Sprinkle evenly with coarse salt. (I usually let it rise from 1-4ish. My dough never rises a ton, even though I do it for the full time).

Baking preliminaries (4:30PM): 20 minutes before baking time, place a rack in the lowest position in the oven; preheat to 500 degrees F. Place the broiler pan on the oven floor. (I place the pan on the very lowest rack and the bread is on the one above it).

Baking (4:50PM): Reduce the temperature to 475 degrees F. Add a cup of ice water to the broiler pan, being careful of splattering and steam. Bake on the lowest rack for 20-30 minutes, until golden brown, turning the pan from front to back for even browning about halfway through. Bake for 5-10 minutes more (or until the center registers 209-212F on an instant-read thermometer) to be sure the center is done. Cool in the pan on a wire rack for 10 minutes. Using wide spatulas, life the bread from the pan onto the rack to cool, or onto a cutting board to cut into servings.

If you use the same timing as I did, your bread will be done by 5:30PM.

Serving and storing: Focaccia is best when fresh. Cut into rectangles and serve warm or at room temperature. Drizzle with additional olive oil or provide more as a dipping sauce, if desired. To maintain crispness, keep, draped with a tea towel, at cool room temperature for 2-3 days. It may be frozen, airtight, for up to 2 months, but should be crisped in a preheated 400 degree F oven before serving.

Variation: Fennel seed and oregano (or thyme) focaccia with salt-prepare the dough exactly as for the rosemary version except omit the rosemary. When garnishing with sea salt just before baking, also sprinkle the dough evenly with 1/2 tsp fennel seeds and 1/2 tsp dried oregano leaves or dried thyme leaves.

Saturday, July 21, 2012

Chocolate Chip Zucchini Bread


Zucchini bread is such a popular bread to bake, but I had never made it before. I came across this recipe on Pinterest and thought it looked good, and decided to make it after I was given some fresh Zucchini. My little girl and I made it this morning, and it is so delicious! This is definitely more of a cake; in fact, it tastes just chocolate cake! I just clicked on the original link it's a Paula Deen recipe, so I guess that makes sense :)! It's super moist and has a great flavor. I had to post it right away!

Chocolate Chip Zucchini Bread
Recipe found on Pinterest from this site, originally adapted from Paula Deen on Food Network
I N G R E D I E N T S :
2 1/2 cups all-purpose flour
1/2 cup cocoa
1 teaspoon baking soda
1/2 teaspoon baking powder
1 teaspoon salt
1 1/2 cups sugar
3 eggs
1 cup canola oil
2 teaspoons vanilla
2 packed cups grated zucchini (don’t peel it)
1 cup chocolate chips
D I R E C T I O N S : 
Preheat oven at 350 F. Spray two 9×5 inch pans with nonstick spray.
In a large bowl, stir together flour, cocoa, baking soda, baking powder and salt.
In a medium bowl, beat the sugar and eggs until light and fluffy. Add the oil and vanilla. Add to the dry ingredients along with the zucchini and chocolate chips. Stir just until combined, and divide between the loaf pans.
Bake for 50-60 minutes, or until the tops are cracked and springy to the touch. Makes 2 cakes.

Wednesday, February 15, 2012

Easy Four-Grain Pot Boule

This recipe has intrigued me ever since my friend Anca posted it on her blog. From the book Kneadlessly Simple,  it's a thick, crusty, rustic loaf made in a enamel coated cast-iron pot, so easy to make that you never even have to knead, much less even touch, the dough. Aside from calculating the timing of it all, because it takes a while for a dough like this to do its thing so that you don't have to do anything to it, it is extremely easy and we were super impressed with the results...so don't let the timing stop you from trying it because there is literally next to no hands-on work involved! I served it with lentil soup and it was delicious. We really did love this bread, and I can't wait to try some more recipes from this book....I need to order a copy of it. Until then, Anca has made a few more recipes from it on her blog, so check them out as well. 
The one thing that intimidated me by this bread was that the instructions seemed long and I knew I needed to calculate the timing out so that it would be ready in time for dinner. However, the instructions are very easy and the timing is very loose depending on how far in advance you want to start of it, so it's very forgiving. But just in case anyone else out there looks at the instructions and feels a little bit like I did, I am posting the times that I used in order to have it ready by dinner time, so that it might help any of you who wish to try this bread...because I don't want you to have a single excuse for not making it! Also, I did not have rye flour, so I used only cornmeal and all-purpose flour and we loved the results. This bread is delicious, perfect with soup, and the results will make you feel like quite the fancy baker despite its extremely easy instructions. I think I'll definitely be serving this for guests the next time I cook soup for a crowd!
I've always been one to say I'm not big into baking, but after making a bread like this, I'm starting to think that maybe that's not so true anymore...

As Anca quoted the author on her blog, I too will leave you with this quote describing the bread:

From the Introduction to the recipe:
"In the process of using up some packages and tidying up my baking supplies, I tossed a little cornmeal, rolled oats, and rye flour into a white bread dough and discovered I’d created a combination worth repeating. The serendipitous blend lends this homey, crisp-crusted pot bread a light color and subtle, indefinable grain taste that whispers rather than shouts its mixed-grain heritage. It’s a loaf that goes with most anything and often gets compliments. It’s one of my favorites." -Nancy Baggett

And now, the recipe.

EASY FOUR-GRAIN POT BOULE
Yield 1 loaf
I N G R E D I E N T S :
3¼ cups (16.25 ounces) unbleached all-purpose white flour or unbleached bread flour, plus more as needed 
½ cup yellow or white cornmeal, plus 1 Tbsp. for garnish 
½ cup old-fashioned rolled oats or quick-cooking (but not instant) oats (leave oats in original form- no grinding needed).
¼ cup light or dark rye flour (if unavailable, substitute 2 Tbsp. each more cornmeal and oats-I did this)
1 Tbsp. granulated sugar
2 tsp. table salt (I used sea salt)
¾ tsp. instant, fast-rising, or bread-machine yeast (I used Fleischmann's RapidRise Bread Machine yeast)
2 cups ice water, plus more if needed
Corn oil, canola oil, or other mild-flavored vegetable oil or oil spray for coating dough (I used canola oil)

D I R E C T I O N S :
Note the times I did each step in parenthesis below so that it would be ready by late afternoon. The good thing about this recipe is that the times are very broad and flexible...this is just my example of how I did it this first time.

1. Preparing the dough and first rise: 
(Time needed: 12-18 hours. So I assembled it before bedtime the night before, around 10:30PM...it only took about 5 minutes)
In a large bowl, thoroughly stir together the flour, cornmeal, oats, rye flour, sugar, salt, and yeast. Thoroughly stir the water into the bowl, scraping down the sides until the ingredients are thoroughly blended. If the mixture is too dry to incorporate all the flour, a bit at a time, stir in just enough more ice water to blend the ingredients; don’t over-moisten, as the dough should be fairly stiff. 
If necessary, stir in enough more flour to stiffen it slightly (I definitely needed more flour). 
Brush or spray the top with oil. 
Cover the bowl with plastic wrap.
If desired, for best flavor or for convenience, you can refrigerate the dough for 3 to 10 hours (I did not do this, so if you are going to, take that into consideration with your timing).
Then let rise at cool room temperature for 12 to 18 hours; if convenient, vigorously stir once partway through the rise. (I stirred once the next morning around 8:30AM. It deflates and then re-rises).

2. Second rise: 
(I did this around 12:30PM...14 hours after first assembling dough)
Using an oiled rubber spatula, gently lift and fold the dough in towards the center all the way around until mostly deflated; don’t stir. Brush or spray with oil. Re-cover with plastic wrap.

3. Let rise using any of these methods:
(Time needed: 1-2 1/2 hours, or longer if you want to refrigerate it for a while to extend timing. 
I did about a 2 1/2 hour regular rise, from 12:30PM-2:30PM.)
For a 1½- to 2½-hour regular rise, let stand at warm room temperature; for a 1- to 2-hour accelerated rise, let stand in a turned-off microwave along with 1 cup of boiling-hot water; or for an extended rise, refrigerate, covered, for 4 to 24 hours, then set out at room temperature. Continue the rise until the dough doubles from the deflated size, removing the plastic if the dough nears it.

4. Baking preliminaries: 
(I started this part around 2:30PM)
20 minutes before baking time, put a rack in the lower third of the oven (the next to lowest option in your oven...3 down); preheat to 450 degrees. 
Heat a 3½- to 4-quart (or larger) heavy metal Dutch oven in the oven until sizzling hot (check with a few drops of water...I left it in for the whole 20 minutes), then remove it using heavy mitts. 
Taking care not to deflate the dough, loosen it from the bowl sides with an oiled rubber spatula and gently invert it into the pot. Don’t worry if it’s lopsided and ragged-looking; it will even out during baking. Generously spritz or brush the top with water, then sprinkle over a tablespoon of cornmeal. 
Using a well-oiled serrated knife or kitchen shears, cut a ½-inch-deep, 4-inch diameter circle in the loaf center. Immediately top with the lid. Shake the pot back and forth to center the dough.

5. Baking: 
(I started this part around 2:50PM)
Reduce the heat to 425 degrees(I forgot to do this part and it turned out fine but please take note of it!). Bake, covered, on that lower rack for 50 minutes (My time: 2:50PM-3:40PM). 
Remove the lid. 
Reduce the heat to 400 degrees. 
Bake for 15 to 20 minutes longer, until the top is well browned and a skewer inserted in the thickest part comes out with just a few crumbs on the tip (or until center registers 210 to 212 degrees on an instant-read thermometer). (My time: 3:40PM-4:00PM).
Then bake for 5 minutes longer to ensure the center is baked through.
Cool in the pan on a wire rack for 10 to 15 minutes. Remove the loaf to the rack. Cool thoroughly.
(So for me, the bread was completely baked and cooled by around 4:30PM...just in time for dinner an hour later.)

6. Serving and storing: Cut or tear the loaf into portions; it tastes good warm, but will cut better when cool. Cool completely before storing. To maintain the crisp crust, store in a large bowl draped with a clean tea towel or in a heavy paper bag. Or store airtight in a plastic bag or foil; the crust will soften, but can be crisped by heating the loaf, uncovered, in a 400-degree oven for a few minutes. The bread will keep at room temperature for 3 days, and may be frozen, airtight, for up to 2 months.


Monday, January 30, 2012

whole wheat sandwich bread ::re-post::

I am reposting this recipe because this bread has been gracing our kitchen counter a lot lately, because I have been making it weekly for our sandwich bread. I love this bread. It is so easy to make, comes together quickly, rises in the oven, makes 2 loaves, and tastes great. I am very blessed to be the proud owner of a Vitamix given to me from my mother who was no longer using hers, so I'm able to grind my own wheat for it (you can find wheat berries in the bulk bins at stores like Whole Foods or Earth Fare). I love that this bread is very healthy; it's simply a blend of freshly ground wheat from three types of wheat berries, with no other ingredients besides yeast, salt, water, honey, and oil. If you do not own a Vitamix or grain mill, you can always use whole wheat flour from the store. I like to use King Arthurs's wheat flour when I use store-bought. 

Wheat bread
recipe originally from Sue Gregg
Makes 2 loaves

I N G R E D I E N T S :

6 c flour (If you mill your own flour, a good combination is to use even amounts of hard red wheat, hard white wheat, and soft white wheat. If you are buying flour from the store, King Arthur White Whole Wheat is a good option).
2 1/4 c warm water (temp 110-115 degrees)
1/3 c oil (I prefer Safflower, but Canola or Vegetable will give the same results)
1/3 c honey (I prefer raw honey, but any kind will work)
1 T yeast (I always use Rapid Rise bread machine yeast because it does not need to proof and does great)
2 tsp salt

D I R E C T I O N S :

If you have a good mixer and aren't kneading it by hand, combine the water, oil, honey, and salt into the mixer. Mix until well blended with the whisk attachment. 

After this, switch to the dough hook.

Next, add half of the flour. Mix until just blended.

Add the yeast, and mix again until just blended.

Add remaining flour and mix until just blended. Let it rest for 10 minutes.

Knead with your stand mixer for 6 minutes. The dough should come together so that it's not sticking to the sides.

Put it into greased loaf pans (I've found that greasing with butter works best) and let it rise in a warm oven (170 degrees), covered with a dish rag or cloth napkins, for 45 minutes.

Remove covers (don't forget that part!). 

Turn oven up to 350 (keep the bread in the oven while it is heating), and bake for 25 minutes.

The internal temperature should be 95-105 F.

To cool, loosen with a butter knife and place on cooling rack on their sides.

Use a pastry brush to brush a little butter over the tops for a nice soft crust.

This recipe also makes a great whole wheat pizza dough:
If you are making pizza dough, simply follow the instructions up until letting it rise. Simply combine the ingredients, let it rest, knead it, and roll it out. It makes enough for 2 thick crust pizzas or 3 thinner crust pizzas. You can also freeze the dough balls (I wrap each one in saran wrap and then put them in a freezer ziploc bag) and let one thaw in the fridge the day you want to make it.
To bake the pizza, roll out the dough, add toppings, and bake for 10-15 minutes at 425 degrees.
For a complete pizza recipe including sauce, go here and scroll down.


Thursday, January 19, 2012

French bread ::re-post::


We are trying to move away from white flour in our house, but sometimes it's nice to have a classic white bread. Such is the case with this french bread, which is great with pasta and soup, and even though it's made with white flour, at least it's still healthier than what you would buy in the grocery store in that it doesn't have any extra unpronounceable ingredients. It's simple: Flour, salt, sugar, water, yeast, and oil. It takes some time to make, but is super easy. You just have to give adequate time -roughly 2 1/2 hours- from start to finish time to allow for kneading, resting, and rising time, but don't let the time needed stop you because there is truly very little work actually involved. I used to be pretty intimidated by bread making and I still wouldn't call it my favorite pass time, but this is one of those recipes that truly is so easy to make, especially if you have a stand mixer than will do 90% of the work for you. This recipe makes two large loaves, which is plenty for a dinner party or good to freeze one loaf for down the road.


Grandma's French Bread
from The Sisters' Cafe

I N G R E D I E N T S :
2 ¼ c. warm water
2 T. sugar
1 Tbsp yeast (I use rapid rise or bread machine yeast because you don't really need to let it proof)
1 Tbsp salt
2 Tbsp oil
5 ½ -6 cups flour-stirred before measured

D I R E C T I O N S :
First dissolve sugar and yeast in the warm water. 
Let this proof—or sit for a few minutes until it bubbles. 
Add salt, oil and 3 cups of flour and beat well with dough hook attachment on mixer.
 Add in 2 1/2 -3 more cups of flour. The dough should clean off the sides of the bowl and not be too sticky, but if it is, I've found that adding a little bit of flour at a time until it does clean off the sides of the bowl works perfectly and the bread is still moist.
Knead for a few minutes (I give it about 3 minutes). 
Leave the dough in the mixer to rest for 10 minutes. Then, knead with the stand mixer for 10 seconds,  and then allow dough to rest another 10 minutes. 
Repeat this  for a total of 5 times (I write down the time each time I let it spin for 10 seconds to keep track of how many times it has been).
Next, turn dough onto a floured surface and knead it 2 or 3 times to coat with flour. 
Divide into 2 equal parts. 
Roll each part into a 9x13 rectangle. Roll dough up, starting from long edge of loaf to seal. 
Arrange seam side down on large baking sheet that’s been sprinkled with corn meal, allowing room for both loaves. 
Repeat with second part of dough. 
With a sharp knife, cut 3 gashes at an angle on the top of each. 
Cover lightly; allow to rise 30 minutes. 
Brush entire surface with egg wash (one egg beaten slightly with 1 Tbsp of water). 
If desired, sprinkle with sesame seads. 
Bake for 30 minutes at 375. Cool on racks.
NOTE: For a crustier loaf, a pan of hot water may be set on bottom of oven while bread is baking  (I was happier with the results when I did not do this).

Tuesday, October 05, 2010

Pumpkin Bread


Fall is here, and what better way to ring it in than with the smell of fresh pumpkin bread baking in your oven? I look forward to making this recipe every fall, and am never disappointed. I love that this recipe makes 3 loaves, which is perfect for either freezing, or giving to neighbors and friends as a gift. This is always a hit in our house!
You can also make muffins or mini loaves out of this recipe, just adjust cooking time as noted below.

If you just want to make one loaf, then please note the adjusted ingredient amounts (in parenthesis).

Pumpkin bread
Original recipe found here at Allrecipes.com

I N G R E D I E N T S :
3 cups canned pumpkin puree (or 1 cup)
1 1/2 cups vegetable oil (or 1/2 cup)
4 cups white sugar (or 1-1/3 cup)
6 eggs (or 2 eggs)
4 3/4 cups all-purpose flour (or 1-1/2 cups)
1 1/2 tsp. baking powder (or 1/2 tsp.)
1 1/2 tsp. baking soda  (or 1/2 tsp.)
1 1/2 tsp. salt  (or 1/2 tsp.)
1 1/2 tsp. ground cinnamon  (or 1/2 tsp.)
1 1/2 tsp. ground nutmeg  (or 1/2 tsp.)
1 1/2 tsp. ground cloves  (or 1/2 tsp.)

D I R E C T I O N S :
Preheat oven to 350 degrees F.
Grease and flour three 9x5" loaf pans, mini loaf pans, or muffin tins.
In a large bowl, mix together the pumpkin, oil, sugar, and eggs.
Combine the flour, baking powder, baking soda, salt, cinnamon, nutmeg, and cloves; stir into the pumpkin mixture until well blended.
Divide the batter evenly between the prepared pans or muffin tins.
For bread, bake in preheated oven for 45 minutes to 1 hour. If making mini loaves or muffins, bake for 30-35 minutes.
The top of the loaf should spring back when lightly pressed.

Tuesday, August 10, 2010

Banana nut muffins


My friend Amber at This Mommy Cooks was on the lookout for a banana nut muffin recipe, and I have one I've made numerous times and just love. So, I figured, it would be a good time to just post it on here as well! This recipe is super easy, and very basic. Nothing fancy, but just a good, classic banana muffin. We love this recipe, and I hope you will, too! In fact, I really should make it soon...

*Update: I did make these, and, as always, they were so good! This time, however, I tried to make them a little healthier, and we all loved how they tasted! I also sprinkled some of the nuts on top of the muffins, a la my friend Amber. Please note my changes in {parenthesis}.

Banana Nut Muffins

I N G R E D I E N T S :
1-1/2 cup flour {for a healthier version, use fresh soft white wheat, whole wheat pastry,or white whole wheat flour}
3/4 cup sugar {for a healthier version, use honey instead-I didn't have any, but will do this next time}
1 tsp. baking powder
1 tsp. baking soda
3 very ripe bananas, mashed
1 egg
1/4 cup oil {for a healthier version, use1/3 cup applesauce instead}
1/2 cup chopped pecans or walnuts {optional, but I love them in the muffins}

D I R E C T I O N S  :

Preheat oven to 375 degrees F. 
Combine 1st four ingredients in bowl.
Mix in bananas, egg, and oil.
Mix well, and add 1/2 of the nuts.
Fill muffin tins 3/4 full.
Sprinkle remaining nuts on top of muffins.
Bake at 375 for 20-25 minutes.

Yield: 12

Monday, July 12, 2010

Texas flour tortillas

Did you know you can make your own tortillas? Well, I never knew it could easily be done until I saw two of my friends, Katie and Amber, post this recipe on their blogs. This was exciting to me because I really don't like paying around $3 for store bought whole wheat tortillas that taste so-so, and also because homemade anything is usually healthier. Home made tortillas are very simple; you do not have to be a fabulous baker to accomplish making these! You can make them pretty quickly, and even freeze them with pieces of wax paper in between them. This will definitely save you money, too. 

The only change I made was that I used all whole wheat pastry flour instead of using any all-purpose flour, but it just depends on what type of flour you wish to use (all purpose flour will lend the softest texture, but whole wheat flour is most nutritious). I also made 10 tortillas, rather than 12, out of this recipe, just so they would be slightly thinner. My changes are in italics.

Texas Flour Tortillas
original recipe from the Homesick Texan 

I N G R E D I E N T S :
Two cups of all-purpose flour (can make them whole wheat by substituting one cup of whole-wheat flour for white flour) (this is where I used 2 cups whole wheat pastry flour instead)

1 1/2 teaspoons of baking powder
1 teaspoon of salt
2 teaspoons of vegetable oil
3/4 cups of warm milk

D I R E C T I O N S :
Mix together the flour, baking powder, salt and oil.
Slowly add the warm milk.
Stir until a loose, sticky ball is formed.
Knead for two minutes on a floured surface. Dough should be firm and soft.
Place dough in a bowl and cover with a damp cloth or plastic wrap for 20 minutes.
After the dough has rested, break off eight sections (I made 10 slightly thinner ones), roll them into balls in your hands, place on a plate (make sure they aren’t touching) and then cover balls with damp cloth or plastic wrap for 10 minutes. (It’s very important to let the dough rest, otherwise it will be like elastic and won’t roll out to a proper thickness and shape.)
After dough has rested, one at a time place a dough ball on a floured surface, pat it out into a four-inch circle, and then roll with a rolling pin from the center until it’s thin and about eight inches in diameter. (If you roll out pie crusts you’ll have no problem with this.) Don’t over work the dough, or it’ll be stiff. Keep rolled-out tortillas covered until ready to cook.
In a dry iron skillet or comal heated on high, cook the tortilla about thirty seconds on each side. It should start to puff a bit when it’s done.
Keep cooked tortillas covered wrapped in a napkin until ready to eat.
Can be reheated in a dry iron skillet, over your gas-burner flame or in the oven wrapped in foil.
While you probably won’t have any leftovers, you can store in the fridge tightly wrapped in foil or plastic for a day or so.


Thursday, July 01, 2010

Blender Cornbread


We love to have veggie nights out our house 2-3 times a week; it's easy on the wallet and the waste, and to me it's always a relief to not have to deal with making meat or some type of big main course. Cornbread is a great addition to a veggie night, and I just tried this new recipe. I've never made cornbread from actual corn kernels, but it was very easy and healthy because it's straight from fresh whole grains. This is a great way to prepare a whole grain quick bread without a grain mill; all you need is a blender. This recipe was a cinch and all I had to do was plan ahead and make the batter part in the morning so it could sit during the day before I baked it. We ate part of it for dinner and finished it up the next day at lunch!

Soaked Blender Cornbread

Adapted from Sue Gregg’s Meals In Minutes Cookbook
and courtesy of my friend Kelly
My comments / changes are in italics
I N G R E D I E N T S :
1 cup cultured milk or sour raw milk (plain yogurt thinned with a little water to consistency of buttermilk, or plain kefir, or buttermilk) (I actually used about 2/3 cup regular milk and 1/3 cup plain yogurt)
3 tablespoons maple syrup or honey (If you do not want your cornbread to be sweet, omit this)
2/3  cups dry popcorn corn (plain dried corn kernels)
2⁄3 cup whole wheat pastry grain or 2/3 c cup spelt grain ( I used whole wheat pastry flour)
1⁄₄ cup melted butter or melted coconut oil (I used butter but if you use coconut oil, add it gradually after getting the blender started)
2 eggs
2 teaspoons baking powder
1 teaspoon salt
1⁄₂ teaspoon baking soda


D I R E C T I O N S :
Place milk/yogurt combo or kefir or buttermilk, maple syrup or honey, whole popcorn kernels, grain, and butter in a blender (unless using coconut oil, then add gradually after blender is started). The blender will "grind" the corn kernels along with the other ingredients, leaving maybe just a slight grainy texture, but I didn't really notice any. It was very cake like in texture for me.

Blend all of that at high speed 3-5 minutes.

Cover blender and let stand at room temperature for 8-24 hours for improved nutritional value.Preheat oven to 325°.

Grease 8×8 glass baking pan with soft butter.

Blend in eggs for 2 or 3 minutes on high speed; combine baking powder, soda and salt; add them at the last, just to blend in.

Pour batter immediately into buttered baking pan.  
Bake for 25-35 minutes or until knife comes clean out of center (It only took me about 25-30 minutes).

Tuesday, June 22, 2010

My favorite new pizza crust

Okay, okay, I know what you're thinking: Another post on pizza?? Look, I know I'm addicted to making homemade pizza, and I know I've raved about two different recipes. But THIS, my friend, is my newfound favorite! In fact, I just removed one of those recipes from my blog because I wasn't happy with it after all. But this one...yummm. My dear friend Kelly gave me this incredible bread recipe, and it can also be used to make pizza dough. The results are wonderful and healthy, which is a great combination for pizza! I love using Kelly's freshly milled grain, but when I don't have any, I use King Arthur's Whole Wheat White Flour. This recipe can make either 2 thick crust pizzas, or 3 regular, thinner crust pizzas. Both are wonderful. As usual, my favorite toppings are homemade marinara sauce along with mozzarella cheese, bell peppers, turkey pepperoni (unless I'm trying to be really healthy, then I omit it), and pineapple. But really any combination will do. This is just a great recipe.


Whole Wheat Pizza Dough
Courtesy of Kelly


I N G R E D I E N T S :

6 c flour 
(If you mill your own flour, a good combination is to use even amounts of hard red wheat, hard white wheat, and soft white wheat...otherwise, King Arthur White Whole Wheat is a good store bought option).
2 1/4 c water (temp 110-115 degrees)
1/3 c oil
1/3 c honey
1 T yeast
2 tsp salt

D I R E C T I O N S :

If you have a good mixer and won't knead it by hand, combine the water, oil, honey, and salt into the mixer. Mix until well blended.

Next, add half of the flour. Mix until just blended.

Add the yeast, mix again until just blended.

Add remaining flour and mix until just blended. Let it rest for 10 minutes.

Knead for 6 minutes (I knead it in my mixer with the dough hook, or you can knead by hand).

Once the dough has finished kneading, simply divide it into 2 or 3 dough balls. It makes enough for 2 thick crust pizzas or 3 thinner crust pizzas. You can also freeze the dough balls (I wrap each one in saran wrap and then put them in a freezer ziploc bag) and let one thaw in the fridge the day you want to make it.


To bake the pizza, roll out the dough, add sauce, cheese, and other toppings, and bake for 10-15 minutes at 425 degrees.

This is the marinara sauce I make. I triple the recipe, freeze in individual cup size portions, and defrost when I am going to be making a pizza. I use 1 cup per pizza.

I N G R E D I E N T S :
3 8-ounce cans tomato sauce
3 tsp. oregano
1/2 tsp. garlic powder
3 Tbsp. parmesan cheese

D I R E C T I O N S:
Combine ingredients in a sauce pan on medium-heat, and simmer for a few minutes before adding to the pizza.